- Sign in to the AWS Management Console.
- Move to the EC2 service.
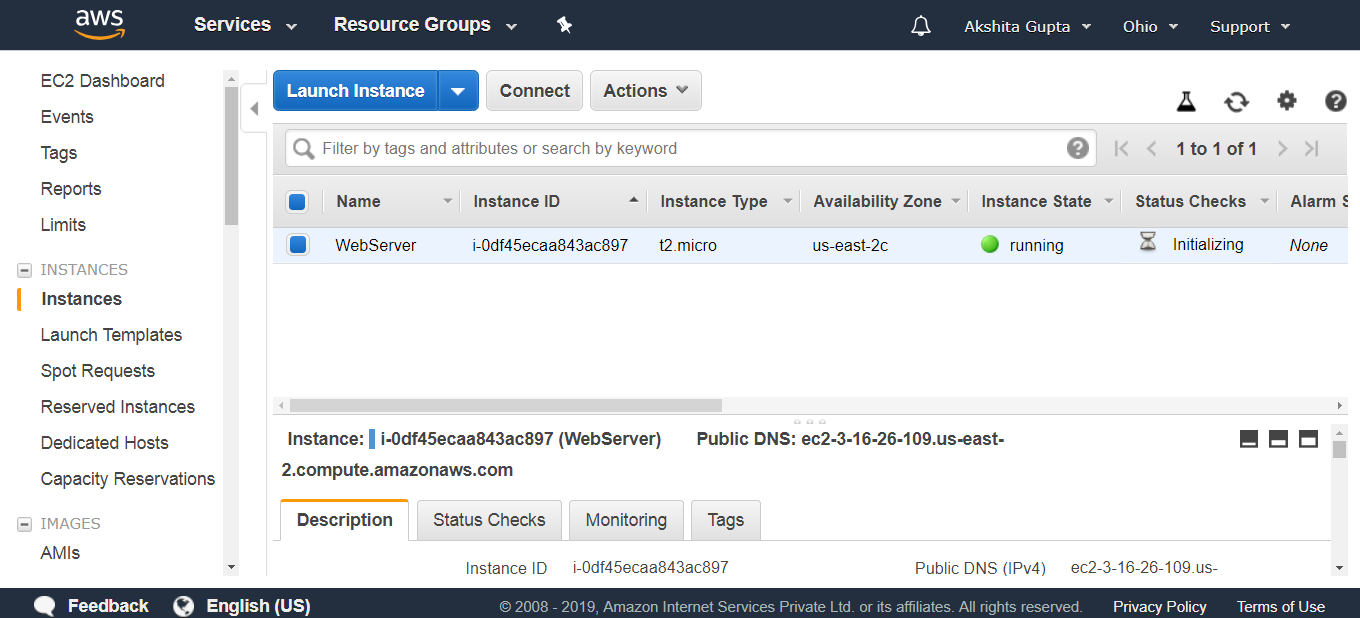
- We have one running instance whose name is WebServer.
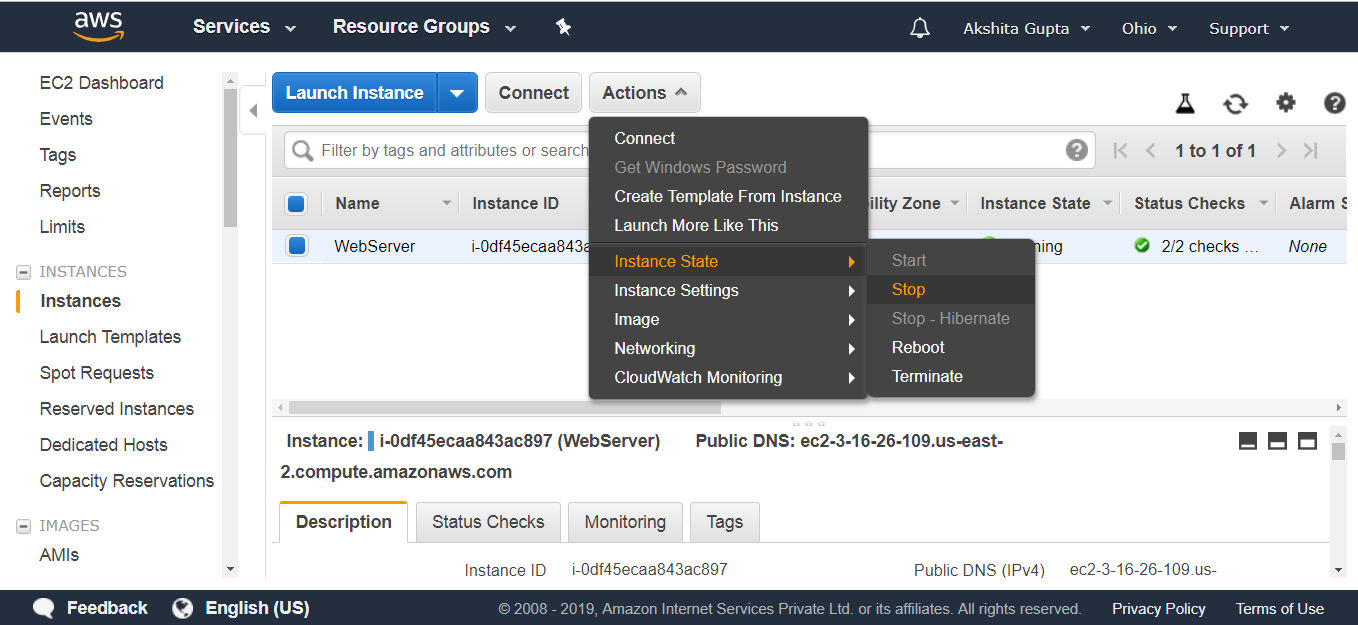
- Now, I want to create a consistent snapshot. In order to achieve this, stop the instance. Click on the Actions dropdown menu.
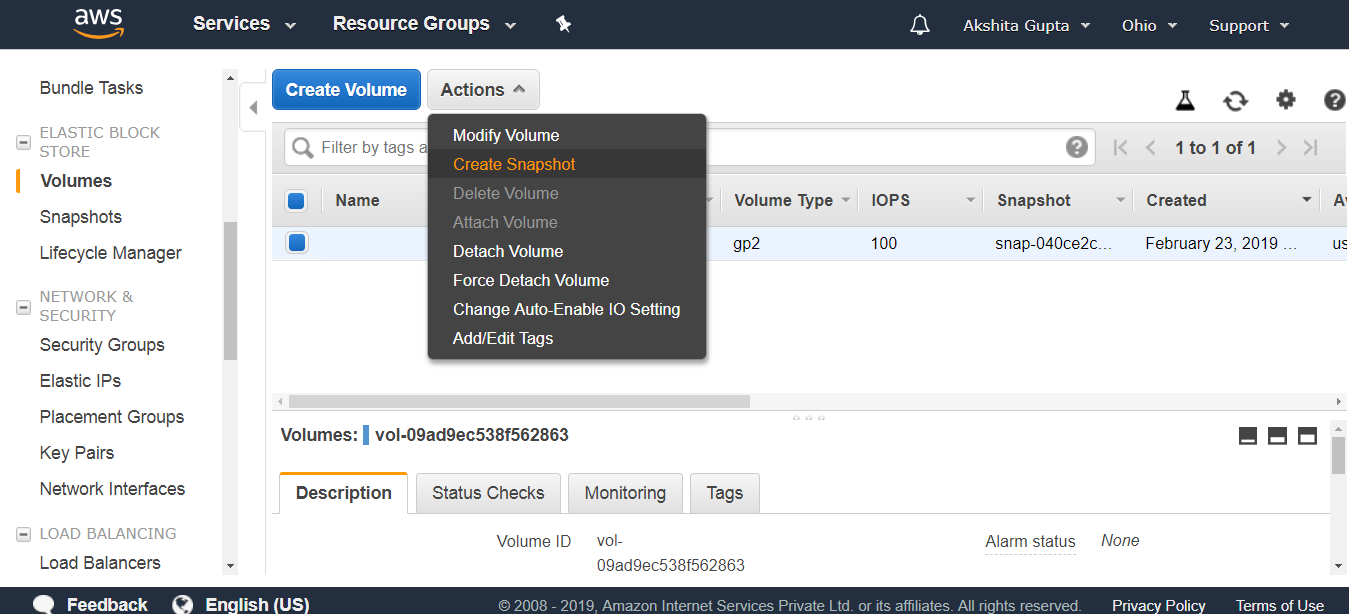
- Move to the Volumes appearing on the left side of the console. Click on the Actions dropdown menu to create a snapshot.
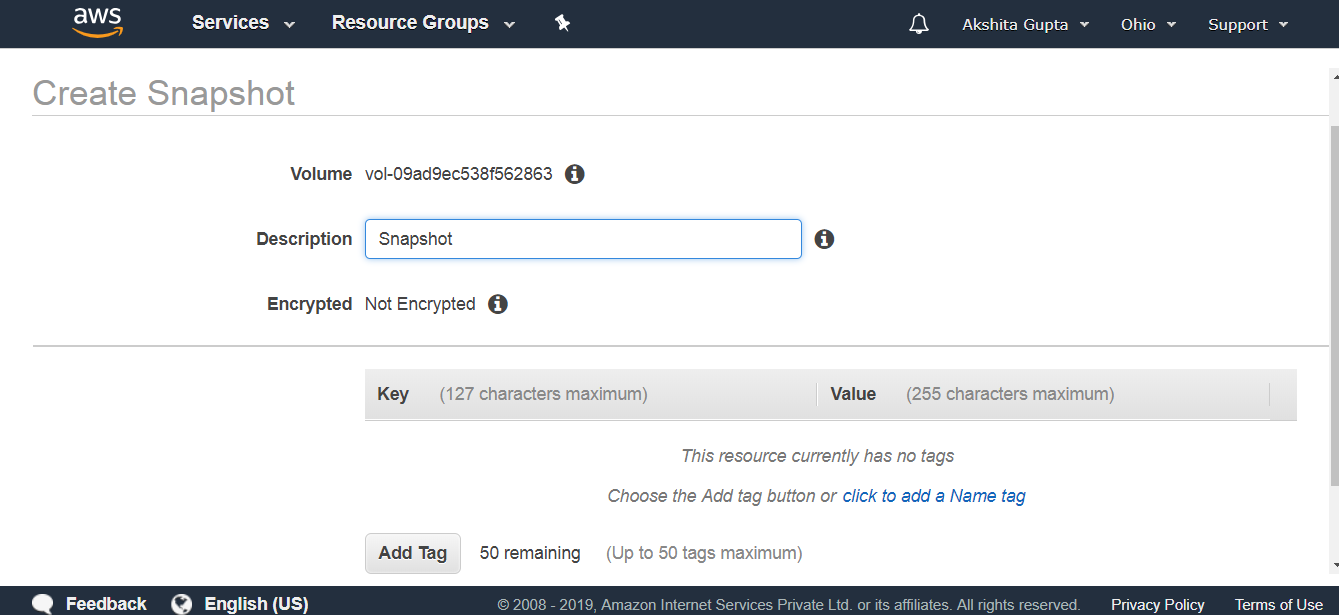
- Create a snapshot.
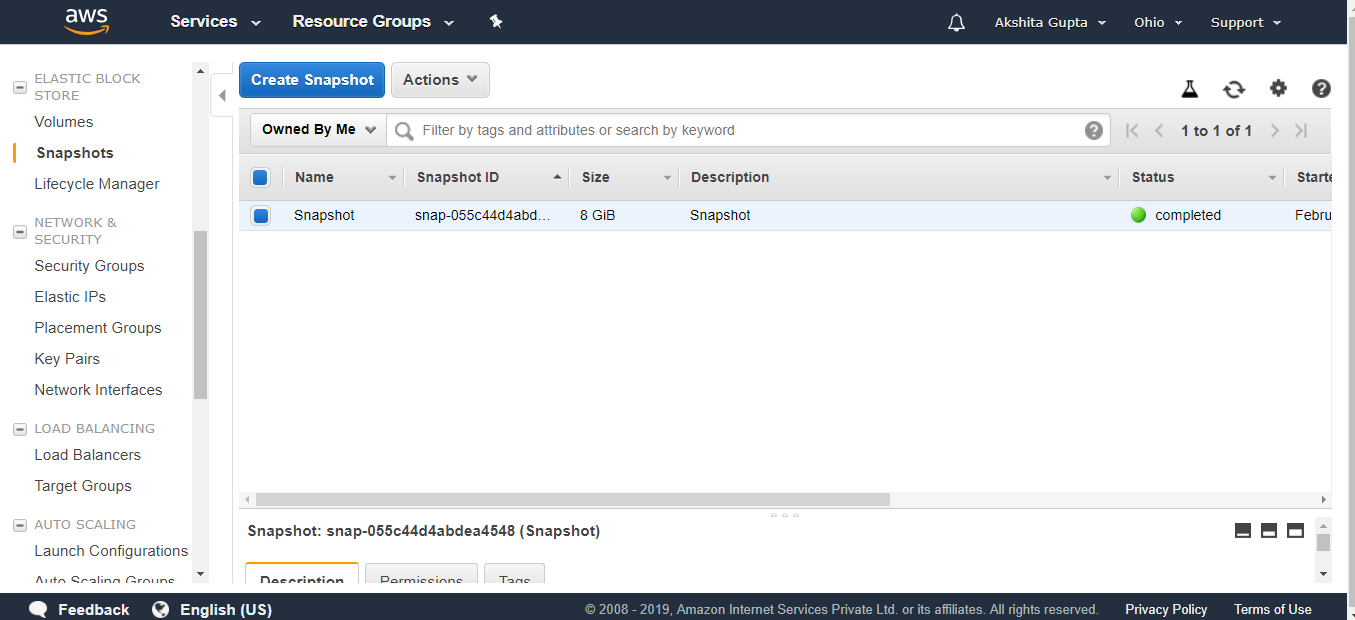
- To view the snapshot, click on the Snapshots appearing on the left side of the console.
- We can also copy the snapshot to another region. Click on the Actions dropdown menu, and then click on the copy.
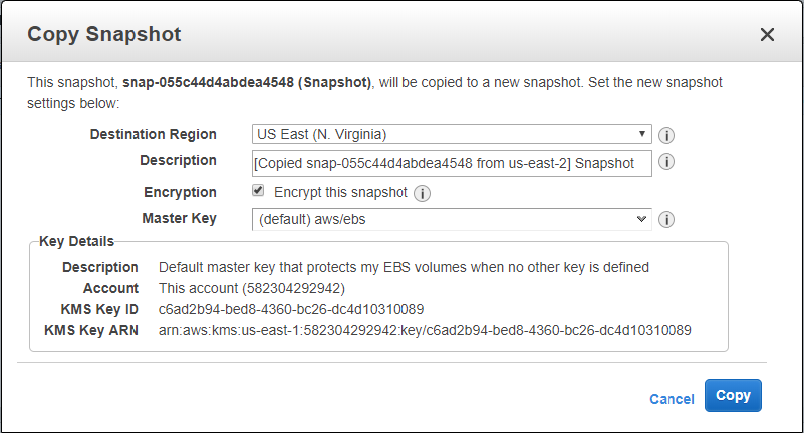
From the above screen, we observe that we can also encrypt the snapshot, so check the encryption box to enable the encryption.
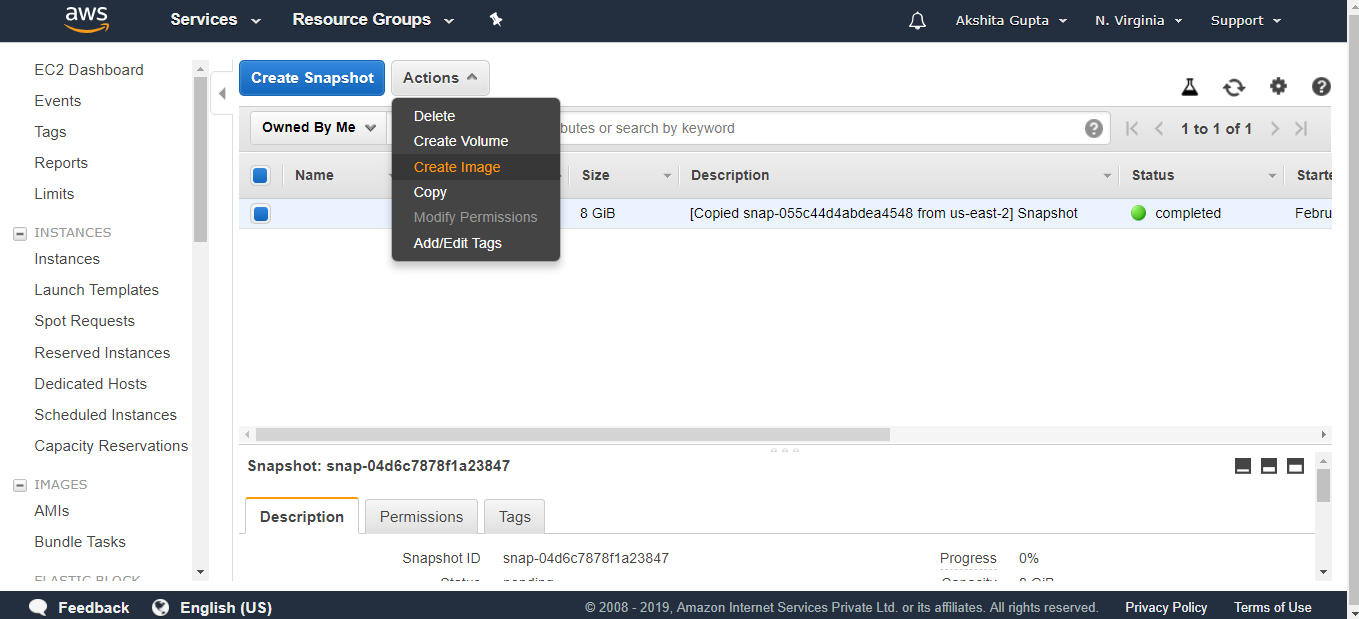
- Move to the US east (N.Virginia) region where we have copied the snapshot.
- Now, we will create an image. Click on the Actions dropdown menu, and then click on the create image.
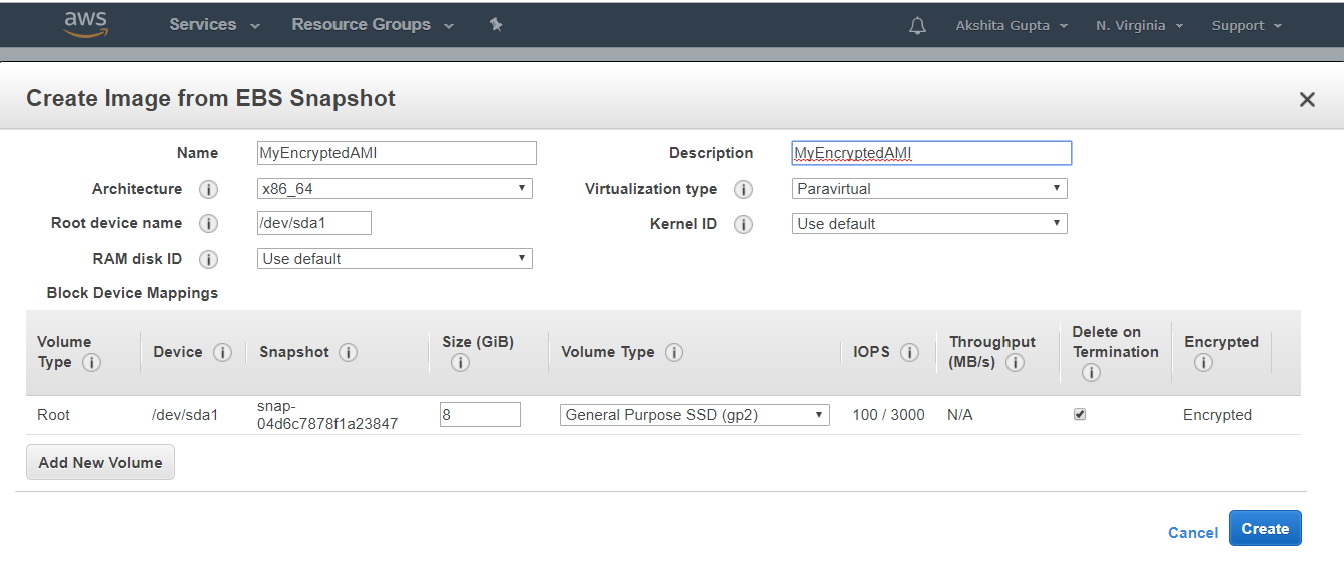
- Enter the name of the image and its description.
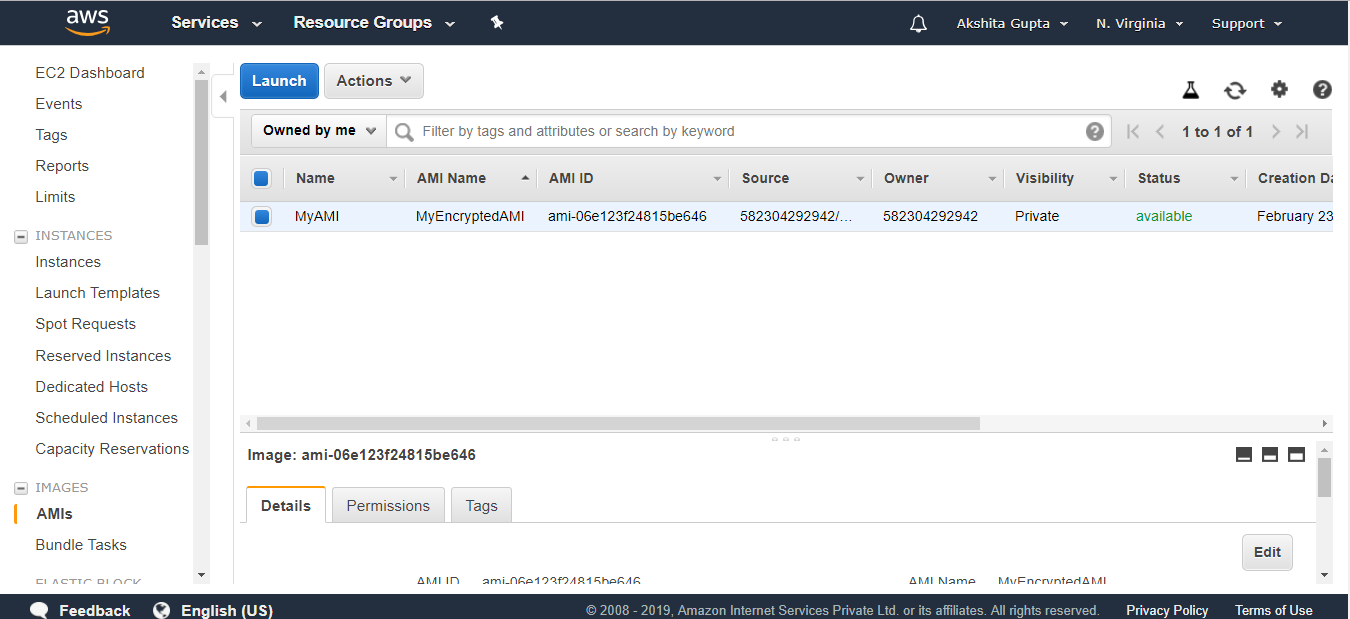
- Click on the AMI appearing on the left side of the console.
- Click on the Launch button.
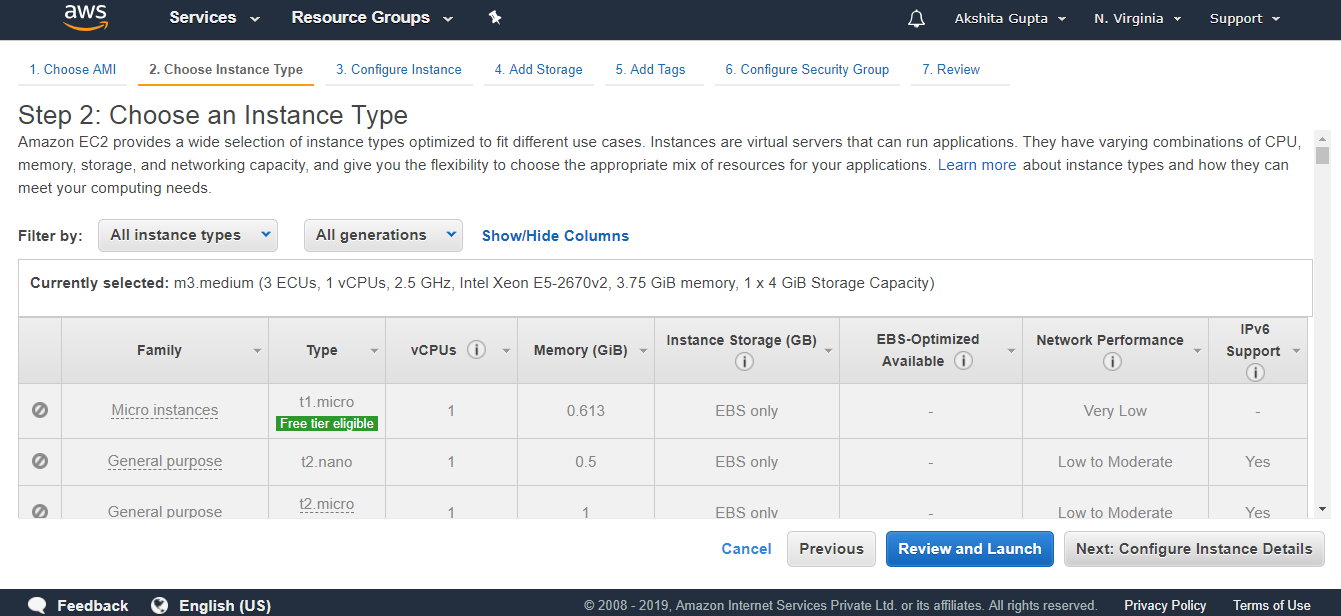
- Choose an instance type and click on the Next.
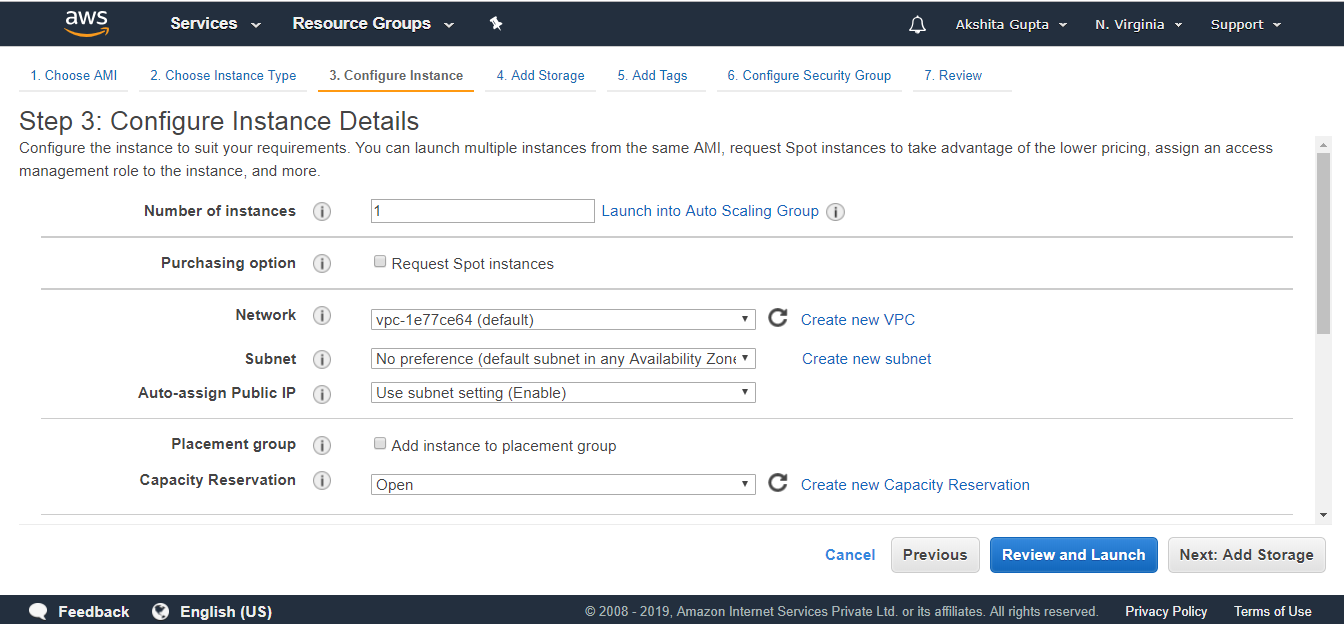
- Configure Instance details. Keep all the instance details as default, and then Click on the Next button.
- (Optional) You can add new EBS Volume.
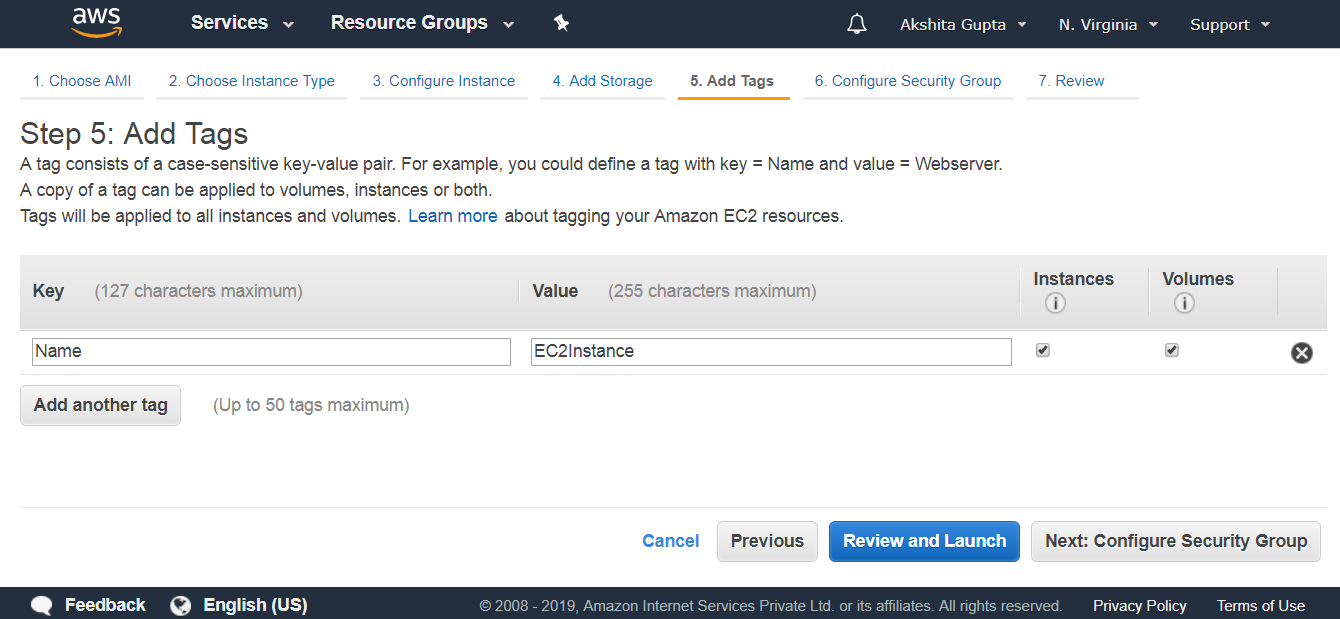
- Add tags. Click on the Next.
- Configure Security Group. Click on the Review and Launch button.
- Click on the Launch button.
Important points to remember:
- To create a snapshot for Amazon EBS Volumes that serve as root devices, you should stop the instance before taking the snapshot.
- Snapshots of encrypted volumes are encrypted automatically.
- Volumes restored from the encrypted snapshots are encrypted automatically.
- You can share snapshots, but only if they are unencrypted.
- These snapshots can be shared with other AWS accounts or made public.

No comments:
Post a Comment