Partial Class in C#
In this article, I explain partial classes in C# language with examples. A partial class splits the definition of a class over two or more source (.cs) files. You can create a class definition in multiple physical files but it will be compiled as one class when the calsses are compiled.
Suppose you have a "Person" class. That definition is divided into the two physical source files, Person1.cs and Person2.cs. Then these two files have a class that is a partial class. You compile the source code then create in a single class. Let's see that in Figure 1.1.
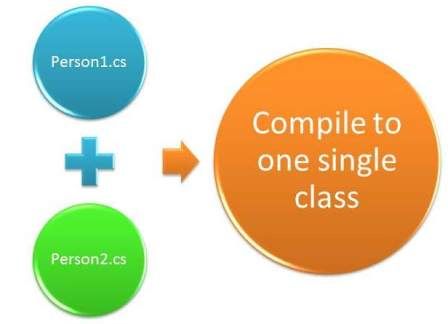
Figure 1.1 : Partial class and compiled class
Advantages of a partial class
Here is a list of some of the advantages of partial classes.
- You can separate UI design code and business logic code so that it is easy to read and understand. For example you are developing an web application using Visual Studio and add a new web form then there are two source files, "aspx.cs" and "aspx.designer.cs" . These two files have the same class with the partial keyword. The ".aspx.cs" class has the business logic code while "aspx.designer.cs" has user interface control definition.
- When working with automatically generated source, the code can be added to the class without having to recreate the source file. For example you are working with LINQ to SQL and create a DBML file. Now when you drag and drop a table it creates a partial class in designer.cs and all table columns have properties in the class. You need more columns in this table to bind on the UI grid but you don't want to add a new column to the database table so you can create a separate source file for this class that has a new property for that column and it will be a partial class. So that does affect the mapping between database table and DBML entity but you can easily get an extra field. It means you can write the code on your own without messing with the system generated code.
- More than one developer can simultaneously work the code for the same class.
- You can maintain your application better by compacting large classes. Suppose you have a class that has multiple interfaces so you can create multiple source files depending on interface implements. It is easy to understand and maintain an interface implemented on which the source file has a partial class. Let's see the following code snippet.
- public interface IRegister
- {
-
- }
- public interface ILogin
- {
-
- }
-
- public partial classUser : IRegister, ILogin
- {
-
- }
-
- public partial classUser
- {
-
- }
Points that you should be careful about partial classes
There are some points that you should be when you are developing a partial class in your application.
- You need to use partial keyword in each part of partial class.
- The name of each part of partial class should be the same but source file name for each part of partial class can be different.
- All parts of a partial class should be in the same namespace.
- Each part of a partial class should be in the same assembly or DLL, in other words you can't create a partial class in source files of a different class library project.
- Each part of a partial class has the same accessibility.
- If you inherit a class or interface on a partial class then it is inherited on all parts of a partial class.
- If a part of a partial class is sealed then the entire class will be sealed.
- If a part of partial class is abstract then the entire class will be an abstract class.
Example
I will develop an example that explains how to use a partial class in your project. Suppose you are working with LINQ to SQL in your application. So you create a data context, in other words a .dbml file and drag and drop the necessary tables. Each table creates a partial class in the data context designer file and each table field becomes a property for the table. Suppose you have a "Person" table that has the three fields "Id","Name" and "DateOfBirth" and you want to show the age of each person in a grid view. What will you do? If you add a new column to the table for age in database for the "Person" table then it fails the normalization rule so you should not do that. If you add a new property to auto-generated code then it will not be mapped to the database. So you need to create a partial class portion in a separate source file that has the "Age" property. This "Age" property calculates the age of the person when you bind a person list to the grid view. Let's see each step-by-step.
- Create a "Person" table in the database.
You need to create a person table in the database that has the three fields "Id","Name" and "DateOfBirth". The "Id" field is the primary key.
- CREATE TABLE Person
- (
- Id int identity(1,1) primary key,
-
- Name nvarchar(50),
-
- DateOfBirth Date defaultgetUtcDate()
-
- )
- Create a web application from Visual Studio.
- Right-click on the project in the Solution Explorer then go to "Add" and click on "Class".
- Choose "LINQ to SQL Classes" from the list and provide the name "Person" for the DBML name. Then click on "Add".
- Drag the User table from the database in the Server Explorer and drop onto the O/R Designer surface of the "Person.dbml" file.
Figure 1.2: Person entity
Now you can open the "Person.designer.cs" file. In the file the "Person" partial class has been created for drag and drops a "Person" table from database on O/RM surface.
- Create a partial class part that has the "Age" property to calculate the age. This file is named "PersonExtension.cs".
- using System;
- namespace PartialClassExample
- {
- public partial class Person
- {
- public int Age
- {
- get { returnConvert.ToInt32(System.DateTime.UtcNow.Date.Year - _DateOfBirth.Value.Year); }
- }
- }
- }
- Create a UI design to show a person's details in the grid view.
- <%@Page Language="C#" AutoEventWireup="true" CodeBehind="PersonUI.aspx.cs" Inherits="PartialClassExample.PersonUI"%>
- <!DOCTYPE html>
- <html xmlns="http://www.w3.org/1999/xhtml">
- <head id="Head1" runat="server">
- <title></title>
- </head>
- <body>
- <form id="form1" runat="server">
- <div>
- <asp:GridView ID="gridPerson" runat="server">
- </asp:GridView>
- </div>
- </form>
- </body>
- </html>
- Write code for the "Page_Load" event to bind a grid view by person list in the code behind file.
- using System;
- using System.Linq;
- namespace PartialClassExample
- {
- public partial class PersonUI : System.Web.UI.Page
- {
- protected void Page_Load(object sender, EventArgs e)
- {
- using (PersonDataContext context =new PersonDataContext())
- {
- var query = from person in context.GetTable<Person>()
- select new
- {
- person.Id,
- person.Name,
- person.DateOfBirth,
- person.Age
- };
- var content = query.ToList();
- gridPerson.DataSource = content;
- gridPerson.DataBind();
- }
- }
- }
- }
- Run the application, you will see the Age column in the grid view that shows the age of each person. Let's see that in Figure 1.3.
Figure 1.3: Output