- Sign in to the AWS Management Console.
- Click on the VPC service under Networking and Content Delivery.
- Click on the "Your VPCs" appearing on the left side of the console.
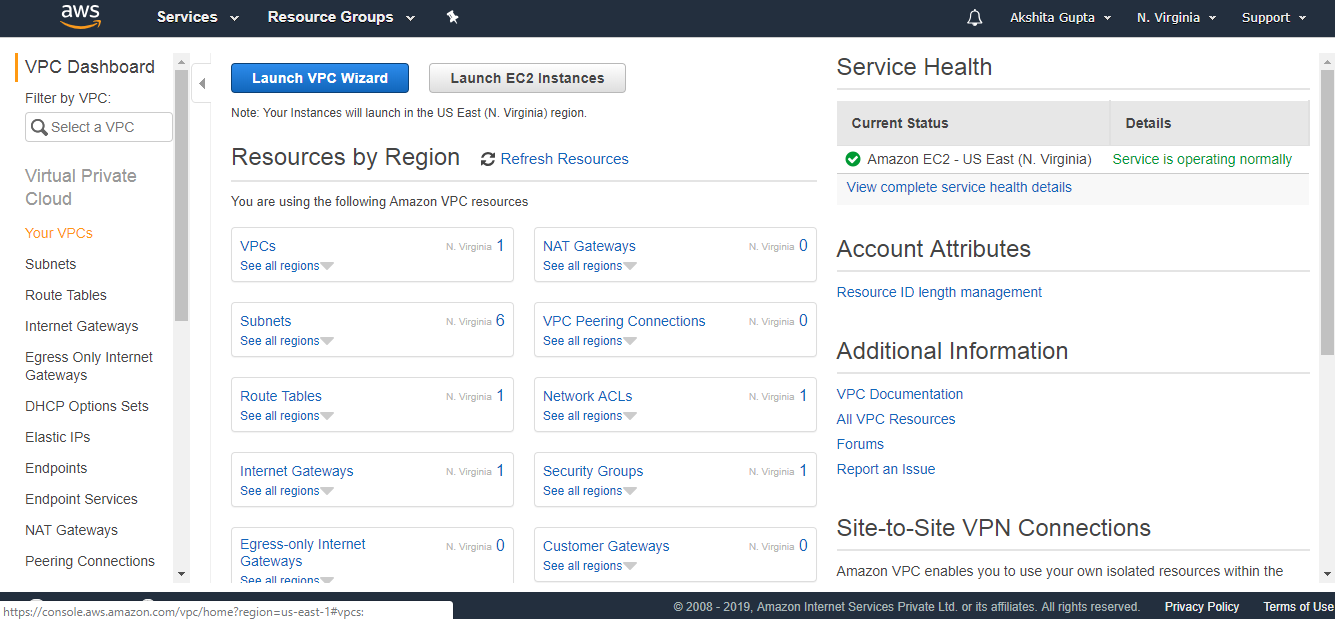
- Click on the Create VPC to create your own custom VPC.
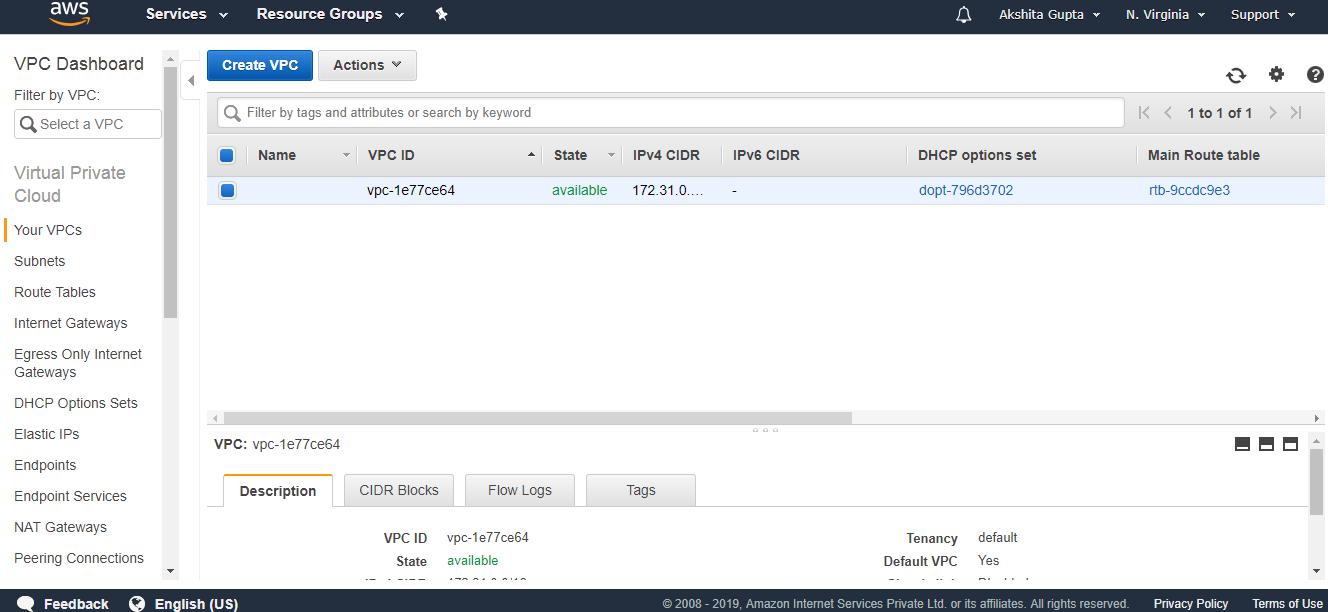
- Fill the details to create a custom VPC.
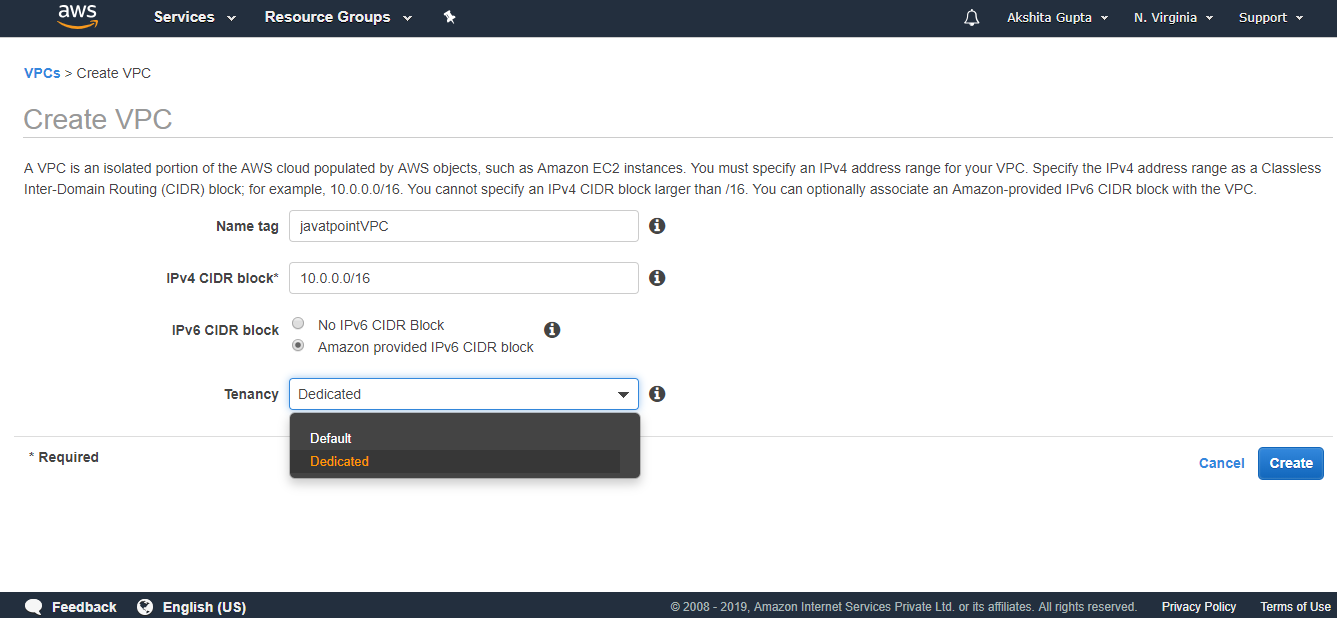
Where,
Name tag: It is the name of the VPC that you give to your VPC. Suppose I have given the name "javatpointVPC".
IPv4 CIDR block: I make this address block as big as possible. I provide the address block as 10.0.0.0/16.
IPv6 CIDR block: You can also provide IPv6 CIDR block. So, I provide Amazon provided IPv6 CIDR block.
Tenancy: We make it as Default.
- The below figure shows that VPC has been created.
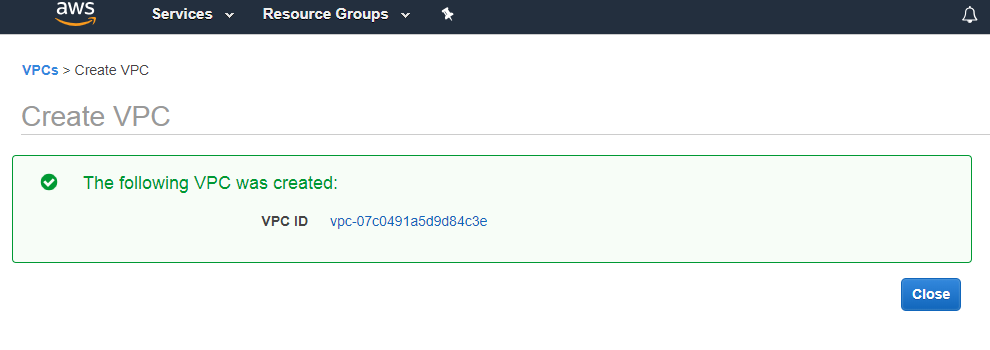
Now we will see what has been created after creating the VPC.
- First, we will look at the subnet.
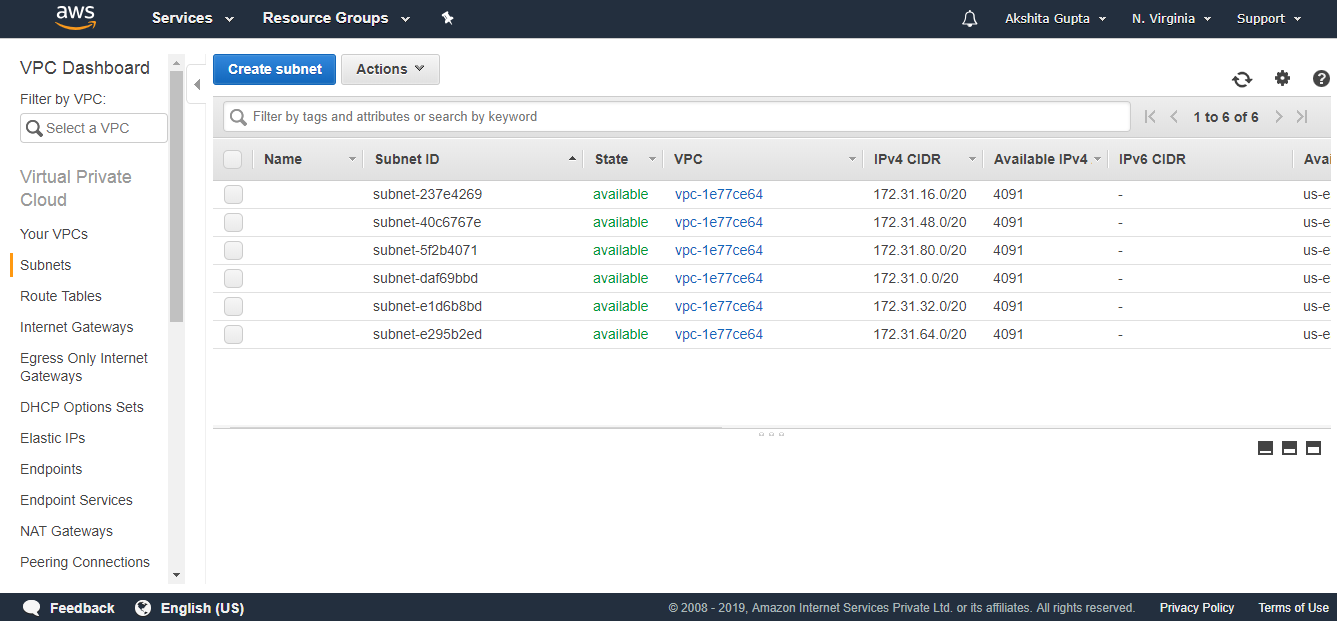
We observe from the figure that all the subnets are of default VPC.
- Click on the Route tables.
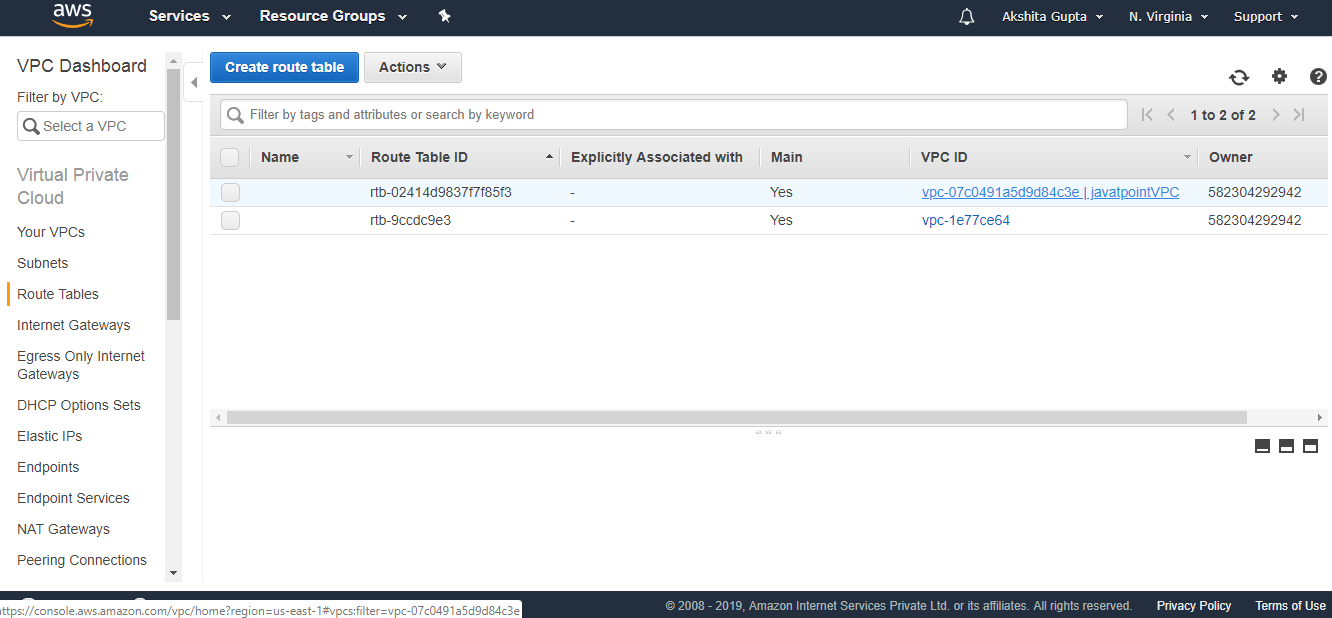
We can observe from the above figure that the route table of "javatpointVPC" has been created.
- Now, click on the internet gateway to check whether it has been created or not.
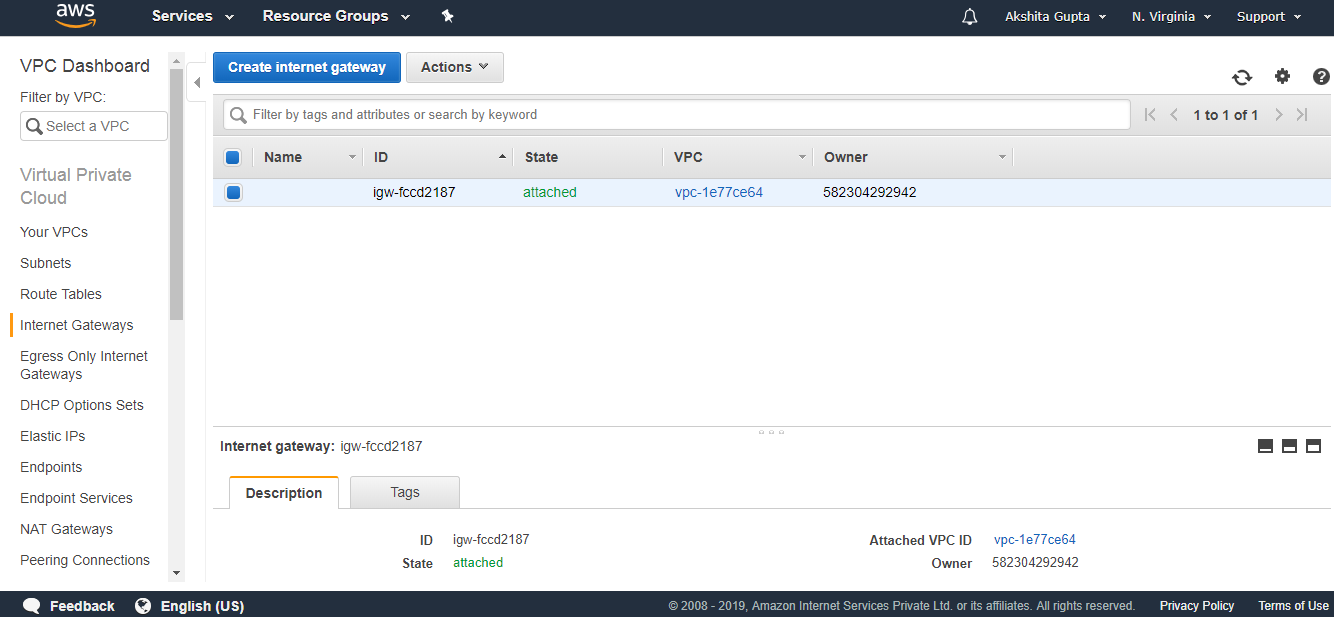
The above figure shows the internet gateway of default VPC. The internet gateway of javatpointVPC has not been created.
- Click on the Network ACL.
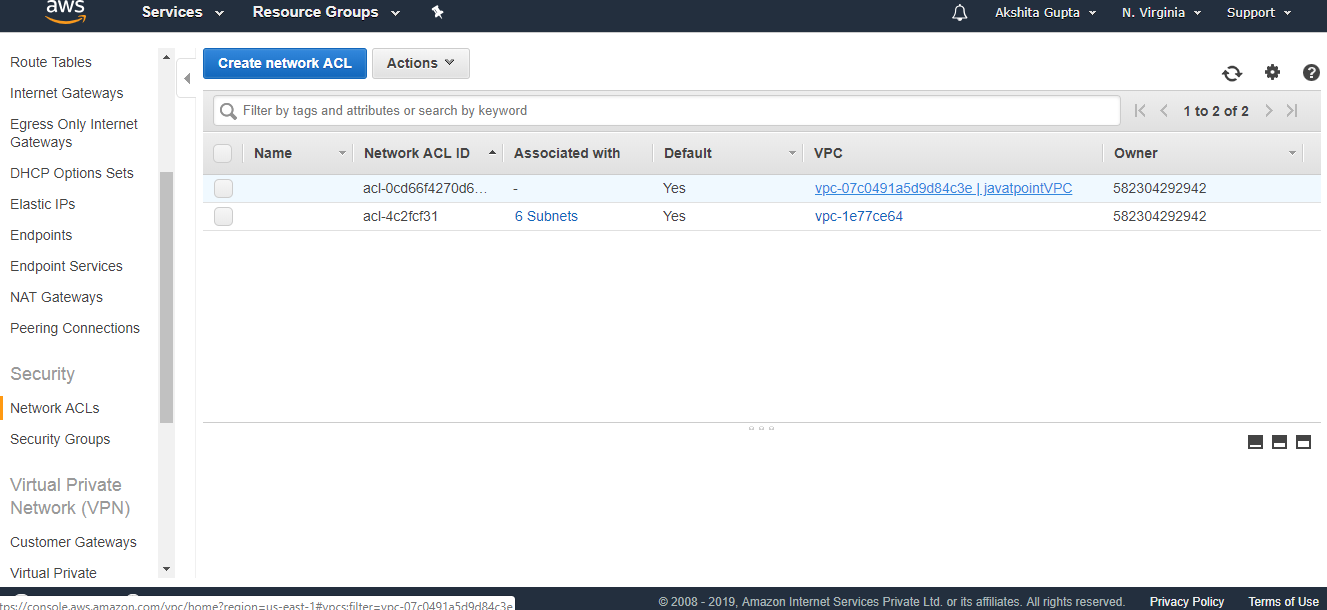
The above figure shows the Network ACL of a VPC that we created, i.e., javatpointVPC.
- Click on the Security Groups.
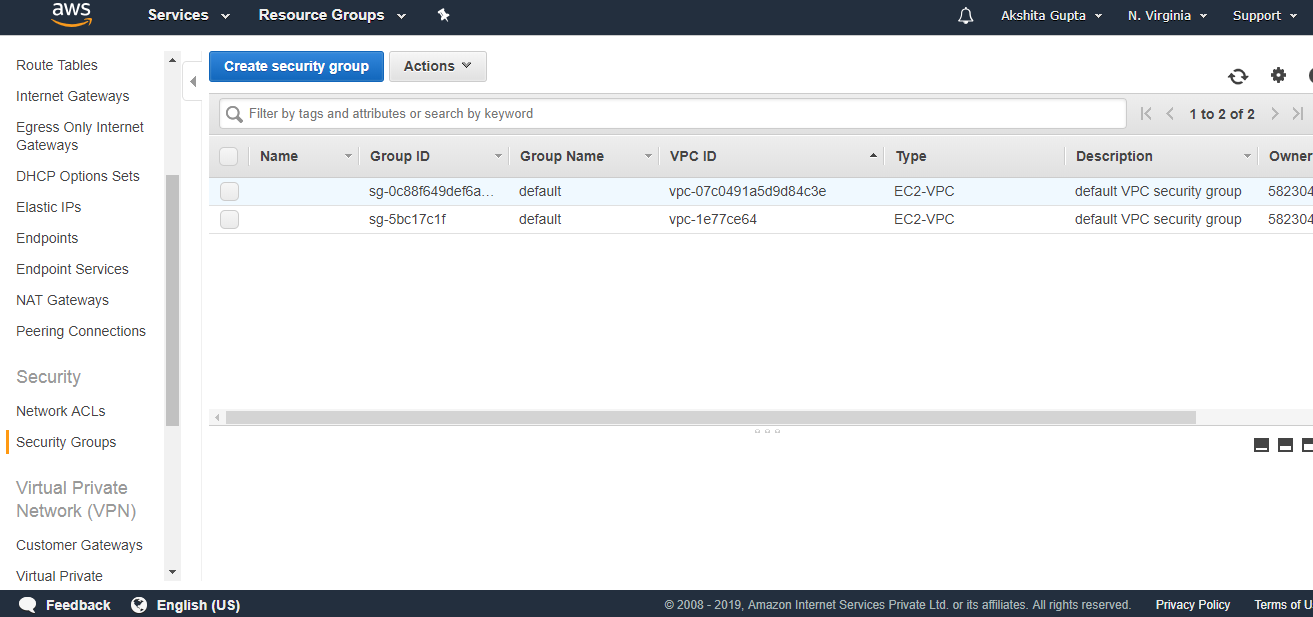
The above figure shows that the security group of VPC, i.e., javatpointVPC has been created.
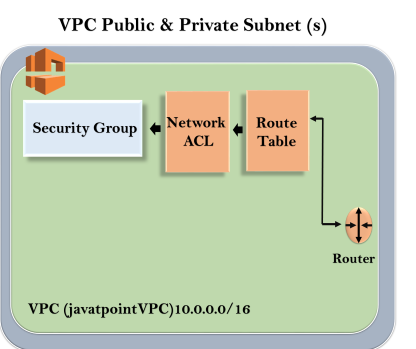
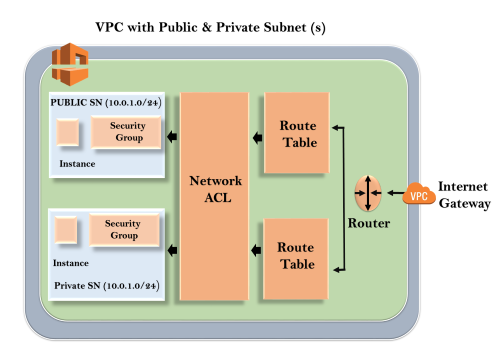
Till now, we observe that VPC creates three services, i.e., Route tables, Network ACL and Security Groups. It is shown in the below figure:
In order to use VPC, we need to create some subnets.
- Enter the details to create a subnet.
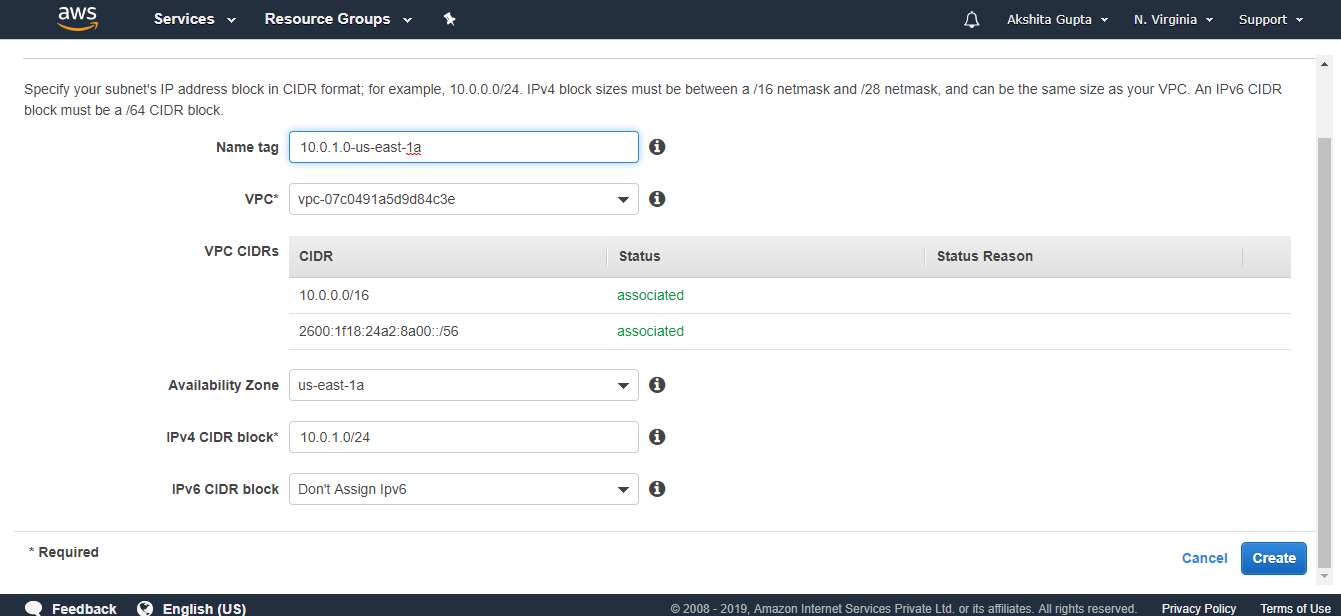
- The below screen shows that subnet has been created.

- Now we create one more subnet.
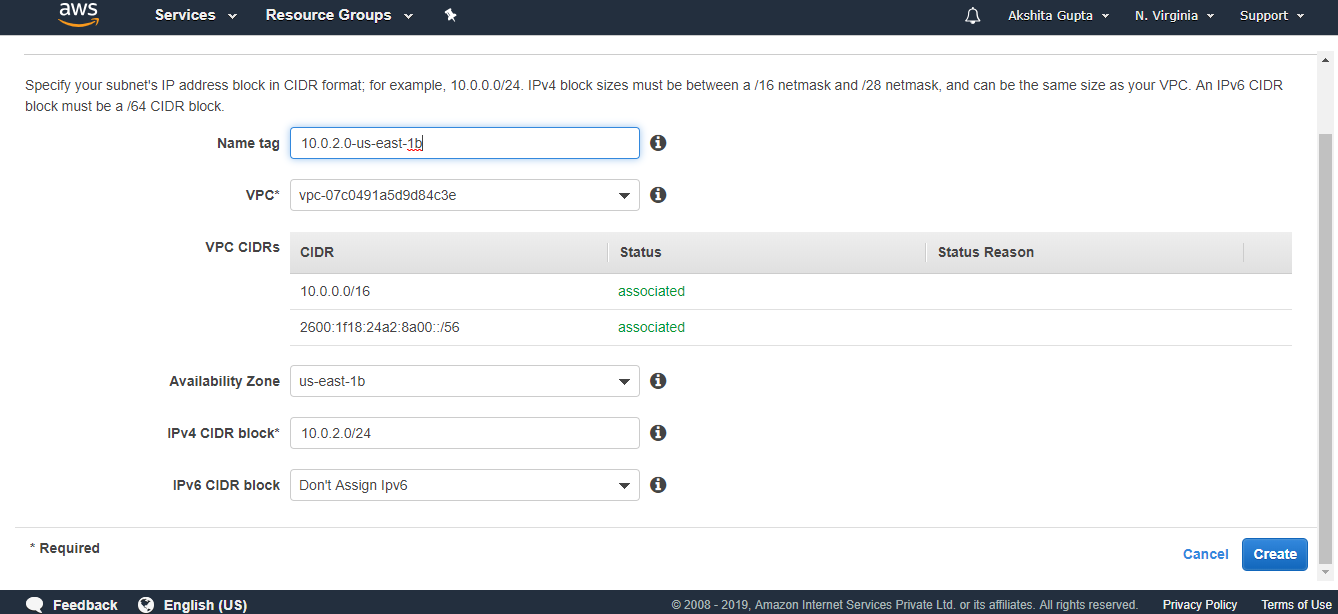
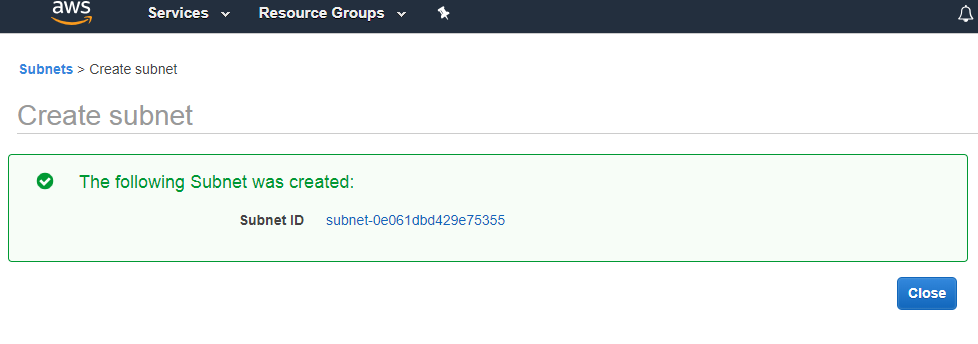
- The below screen shows that subnet has been created.
- The below screen shows the lists of all the subnets. The top two subnets are created by us, and others are default subnets.
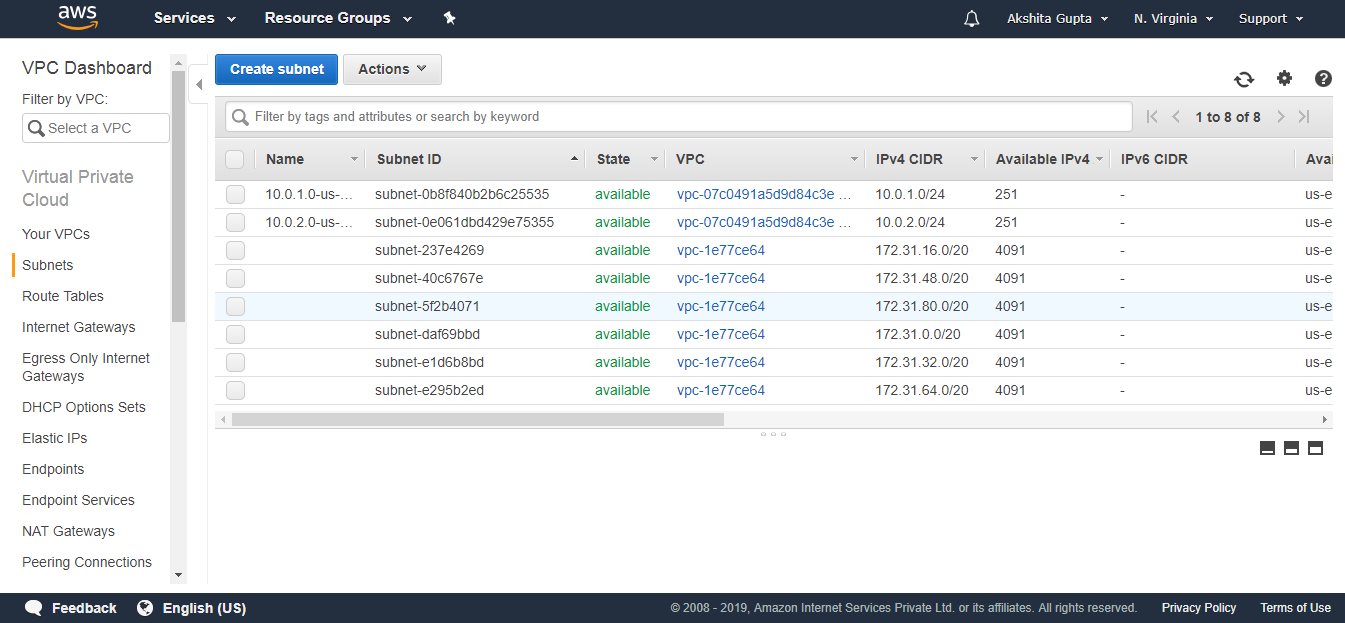
- We already know that in VPC, we have one public subnet and one private subnet. Till now, both are private. So, we make the first subnet as public.
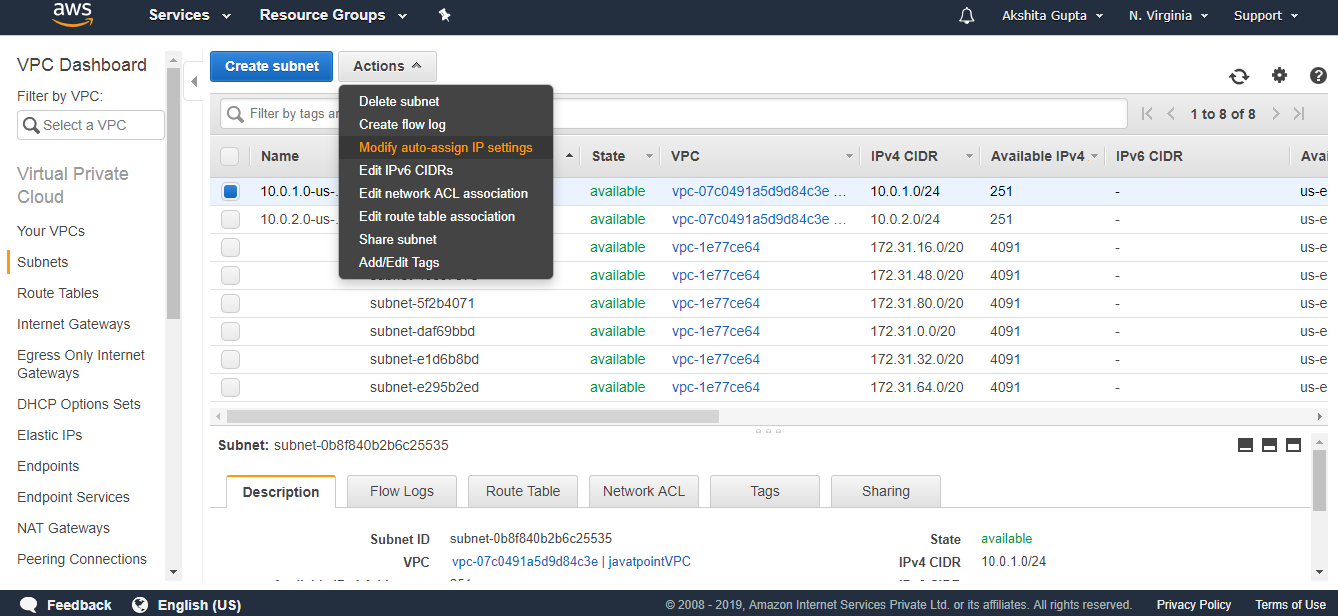
- Now we make a 10.0.1.0-us-east-1a as a public subnet. To make a subnet public, click on the Actions drop down menu and then click on the Modify auto assign IP settings.
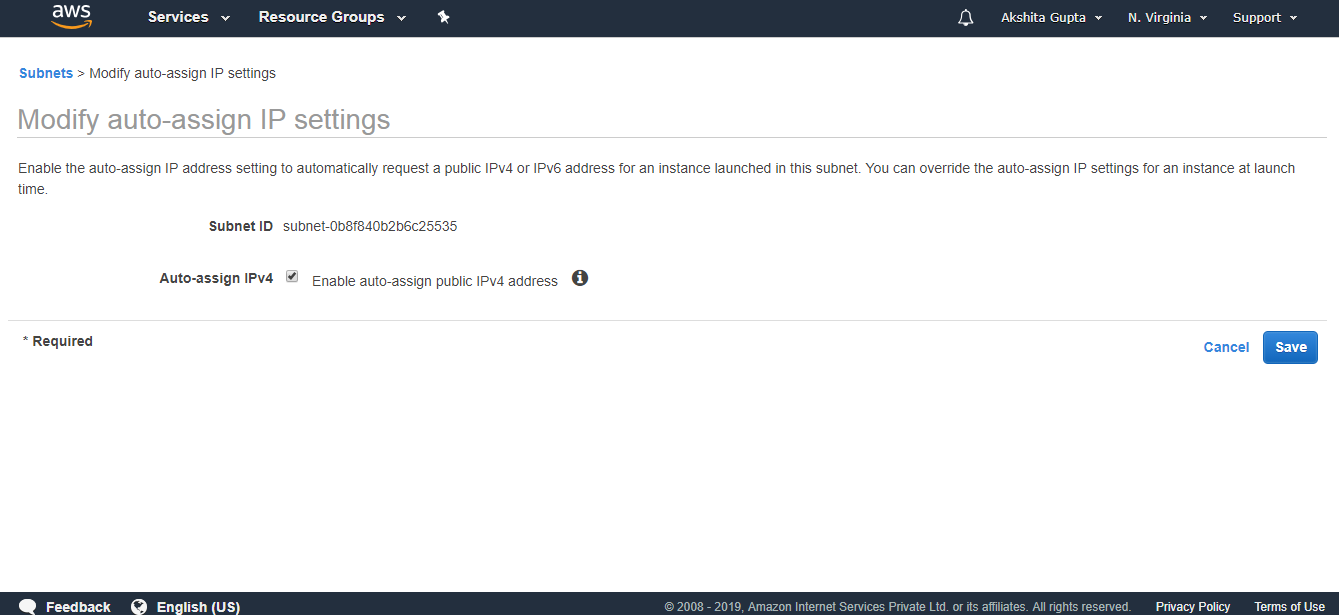
- Check the Auto Assign IPv4 box, and then save the settings.
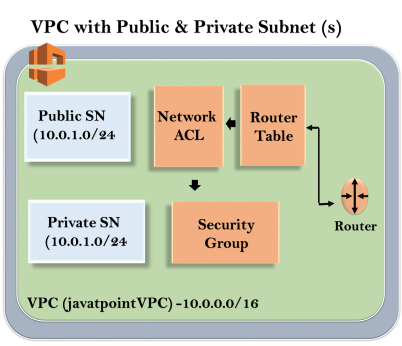
Till now, our VPC looks:
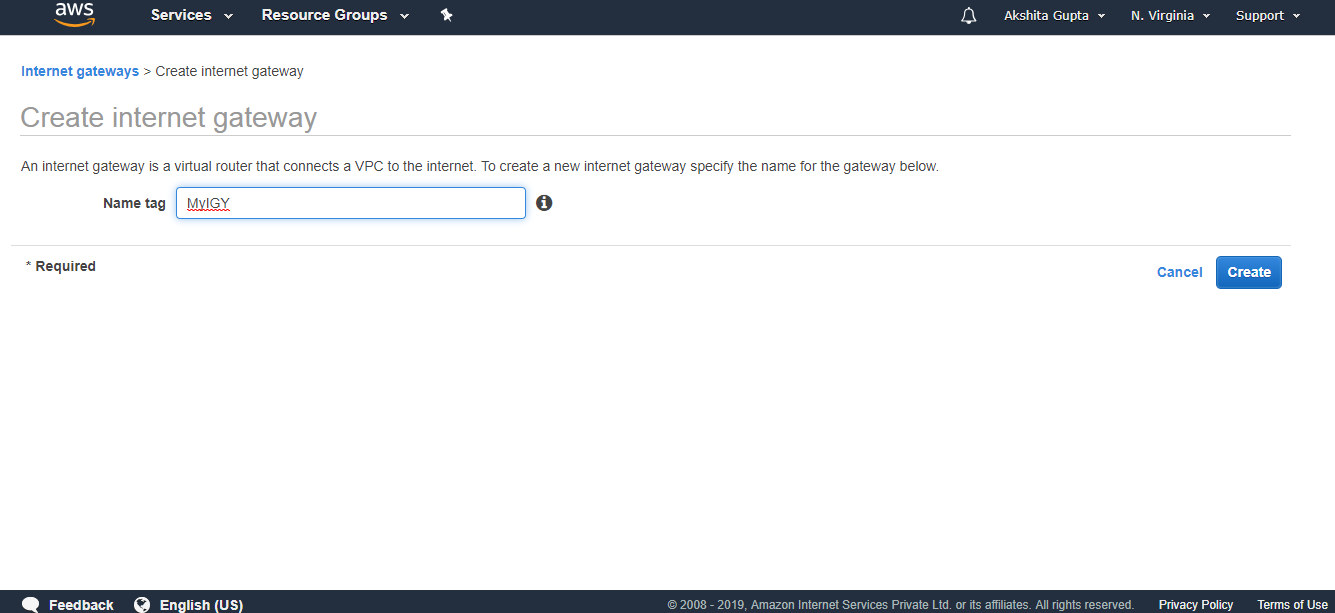
- Now we need a way to get into the VPC, so we need to create an Internet gateway. Click on the Internet Gateway and then click on the Create Internet Gateway.
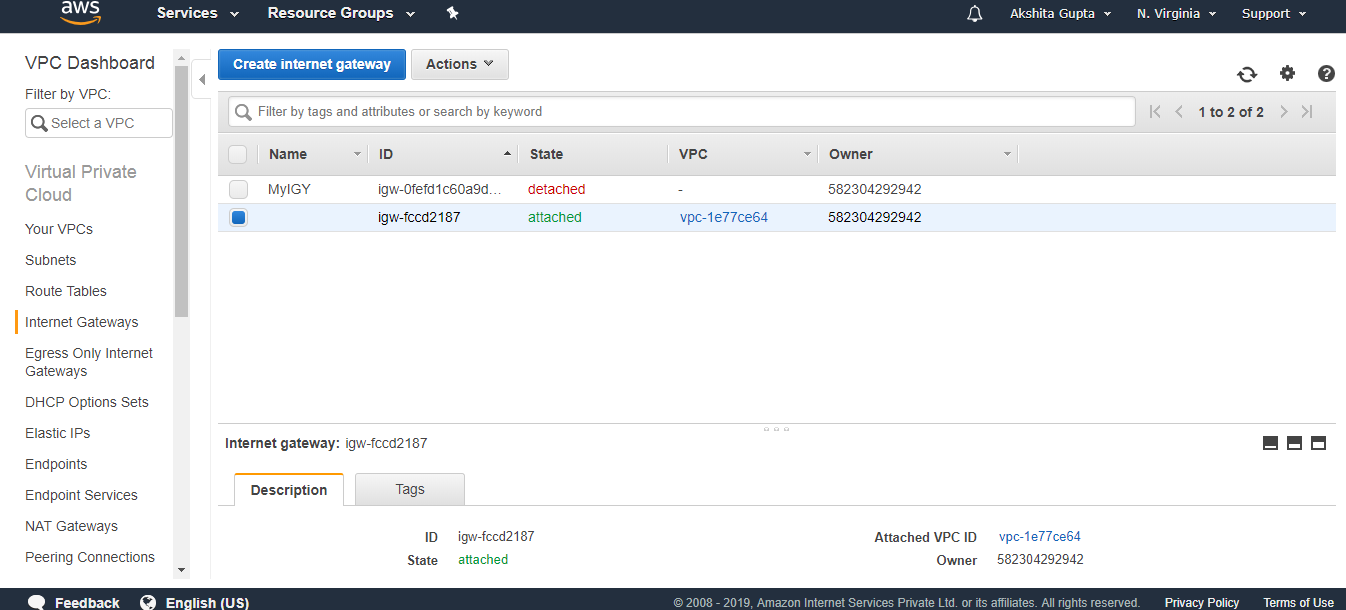
- The below screen shows that internet gateway has been detached from the VPC.
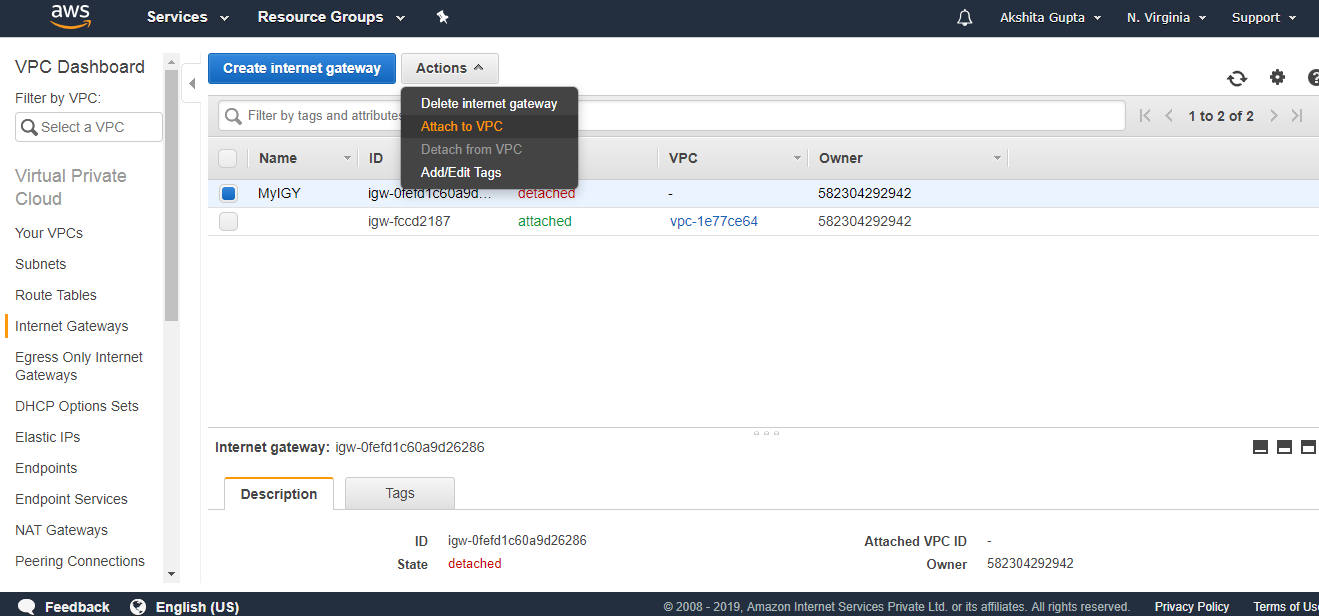
- To attach the internet gateway to VPC, Click on the Actions drop-down menu and then click on the Attach to VPC.
- Select the VPC to which you want to attach your internet gateway.

- Click on the Route Table.
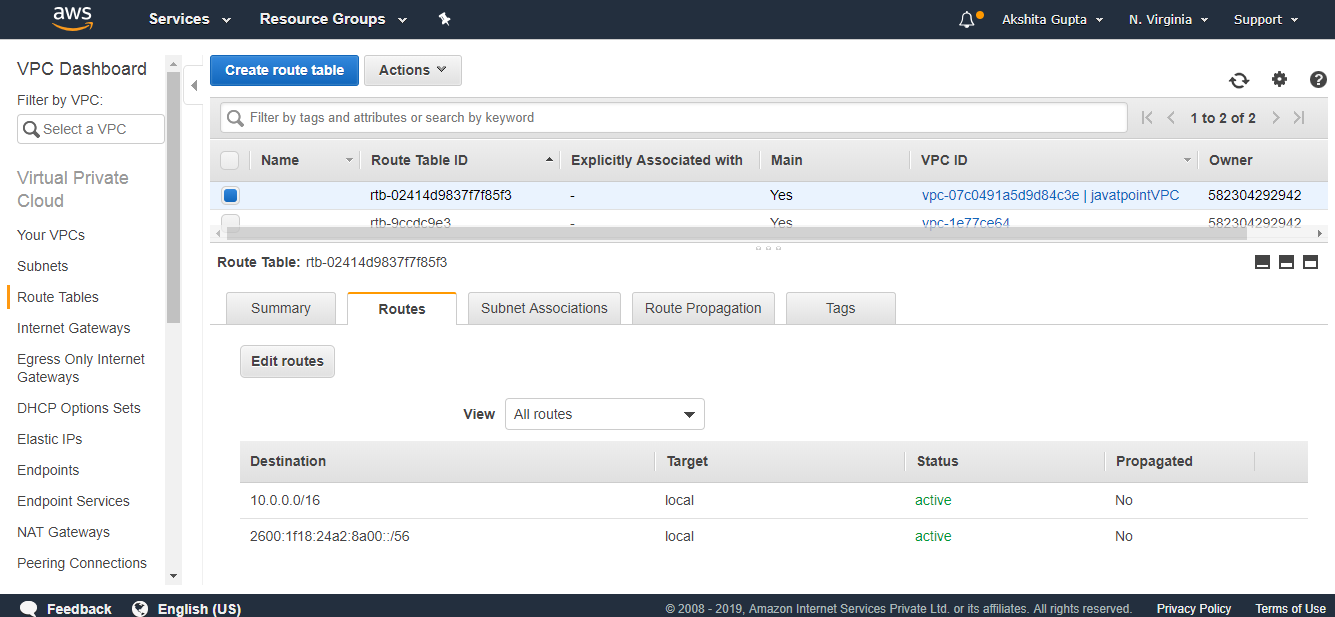
Under Routes, we can observe that the subnets can communicate with each other under these specified routes.
- Click on the subnet associations.
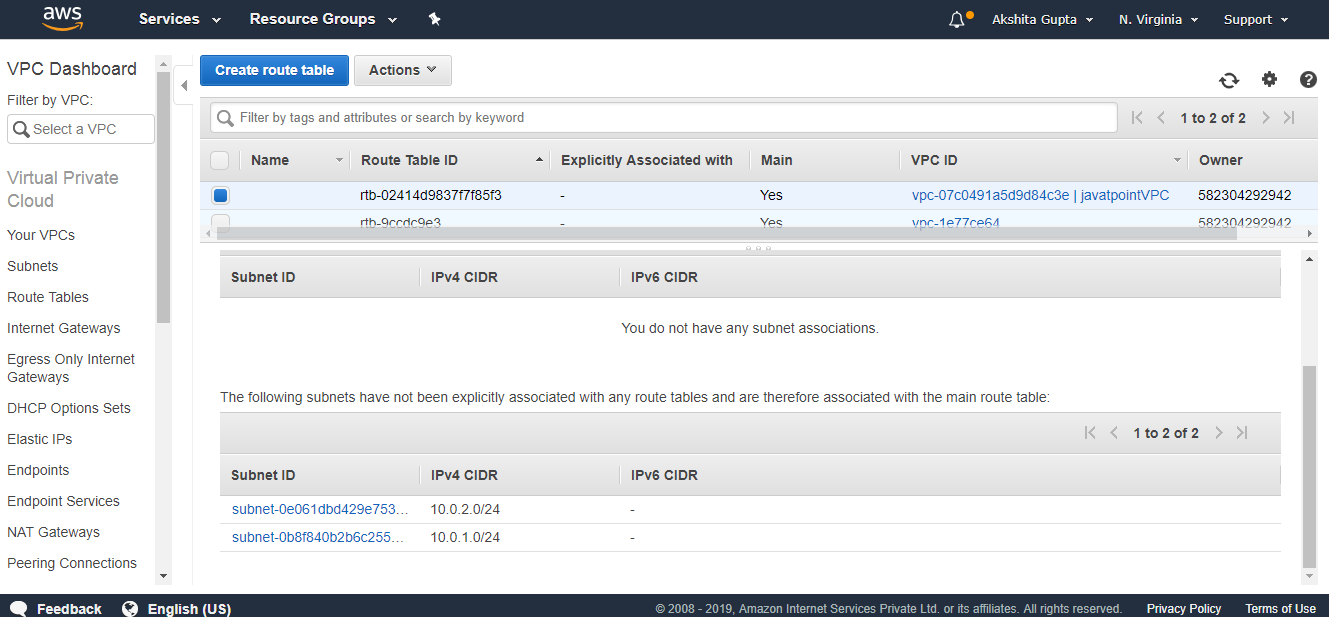
From the above screen, we observe that the subnets we create are automatically associated with the main route table which would be a security concern. To overcome this problem, we create another route table which would be public, and the main table would be private.
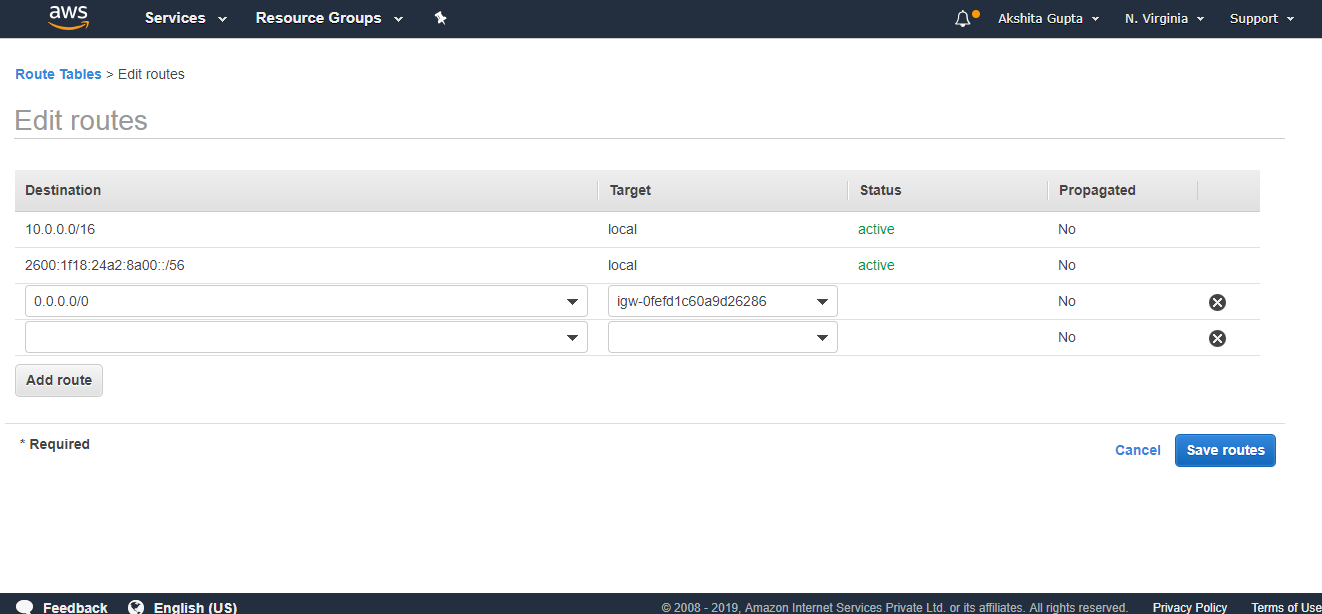
- Click on the route table and then fill the following details.

- Edit the routes in public route table.
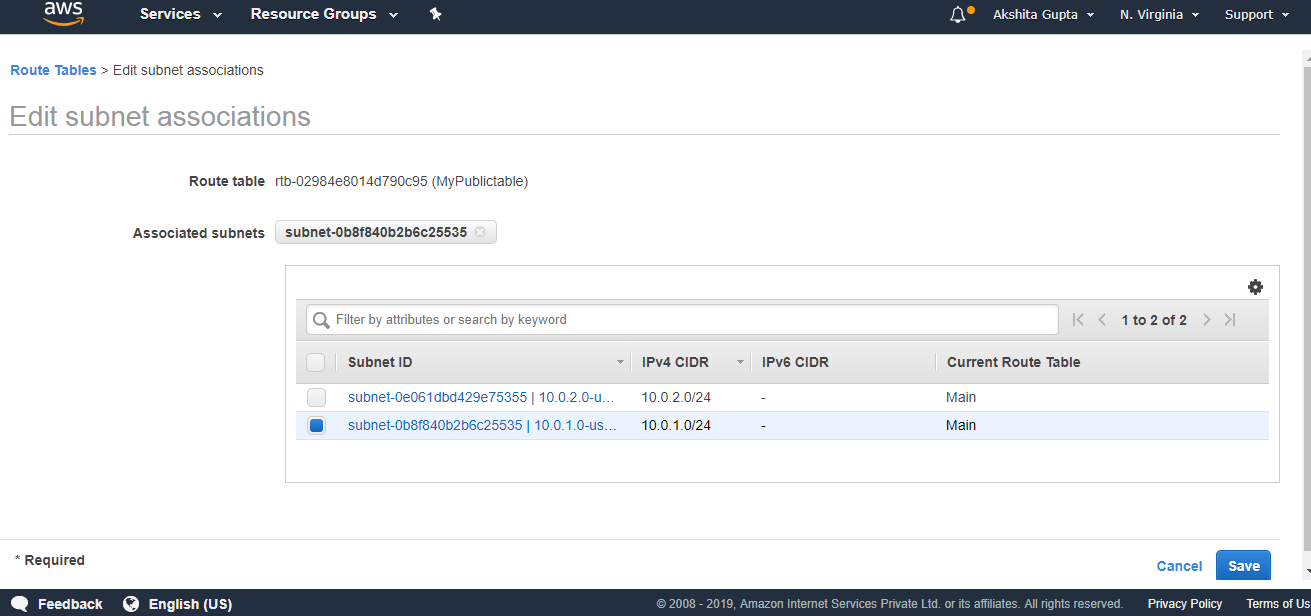
- Click on the subnet associations of a public route table and then click on the Edit subnet associations. In Edit subnet associations, check 10.0.1.0-us-east-1a subnet box and this includes the subnet in a public route table. An Unchecked subnet is associated with the main route table.
- Now we have the last step left, and the last step is to create two EC2 instances. One EC2 instance is created in private subnet and another EC2 instance is created in public subnet.
Finally, our VPC looks, as shown below:
Important points to remember:
- When you create a VPC, a default route table, Network Access Control List and default security group are automatically created.
- It won't create any subnets, nor it will create a default internet gateway.
- Us-east-1a in your AWS account can be completely different availability zone to us-east-1a in different AWS account. AZ's are randomized.
- Amazon always reserves 5 IP addresses within your subnet.
- You can keep only one internet gateway per VPC.
- Security Groups cannot span VPCs.
No comments:
Post a Comment