Sign in to Azure
Sign in to the Azure portal at https://portal.azure.com.
Create virtual machine
- Click Create a resource in the upper left-hand corner of the Azure portal.
- Select Compute, and then select Windows Server 2016 Datacenter.
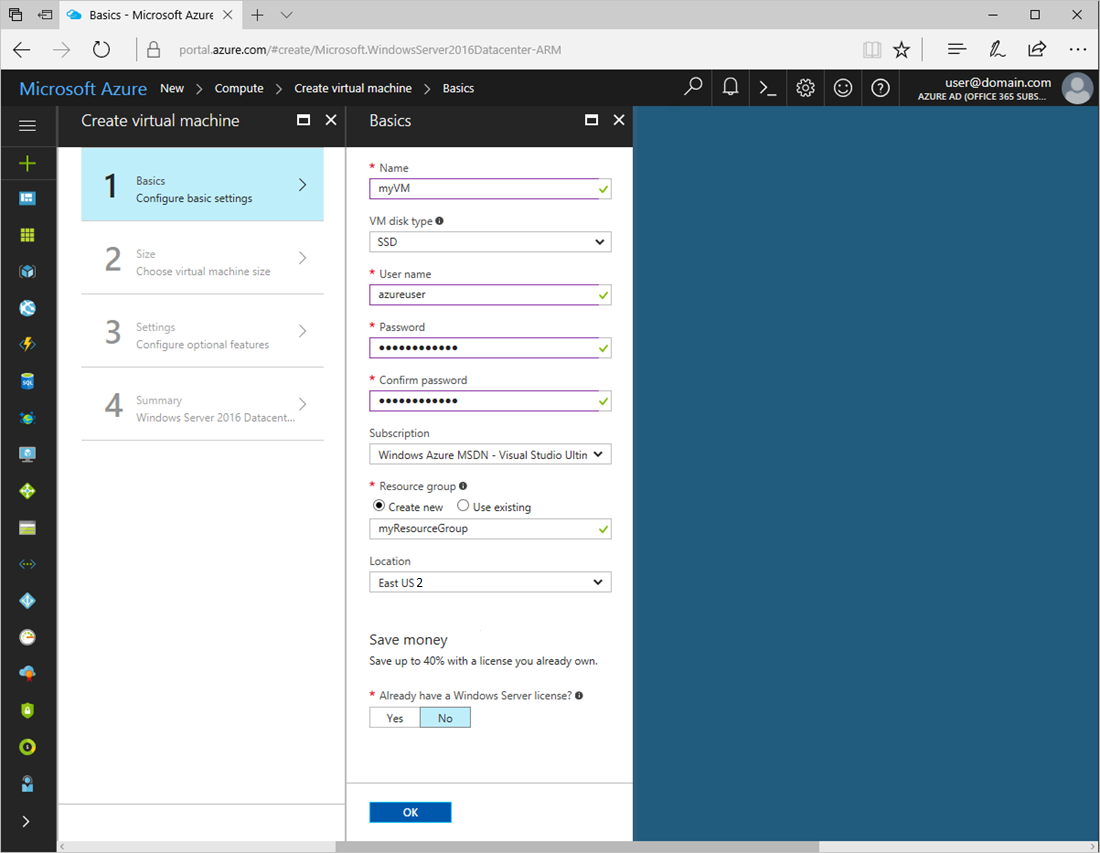
- Enter the virtual machine information. The user name and password entered here is used to sign in to the virtual machine. The password must be at least 12 characters long and meet the defined complexity requirements. Choose a Location such as East US 2 that supports availability zones. When complete, click OK.

- Choose a size for the VM. Select a recommended size, or filter based on features. Confirm the size is available in the zone you want to use.

- Under Settings > High availability, select one of the numbered zones from the Availability zone dropdown, keep the remaining defaults, and click OK.

- On the summary page, click Create to start the virtual machine deployment.
- The VM will be pinned to the Azure portal dashboard. Once the deployment has completed, the VM summary automatically opens.
Confirm zone for managed disk and IP address
When the VM is deployed in an availability zone, a managed disk for the VM is created in the same availability zone. By default, a public IP address is also created in that zone.
You can confirm the zone settings for these resources in the portal.
- Click Resource groups and then the name of the resource group for the VM, such as myResourceGroup.
- Click the name of the Disk resource. The Overview page includes details about the location and availability zone of the resource.

- Click the name of the Public IP address resource. The Overview page includes details about the location and availability zone of the resource.


No comments:
Post a Comment