Recently, I had to create a REST web API project. We had a requirement of communicating from Office 365 apps to the on-premise database. So, we thought of creating APIs hosted on a local server, exposed out of a firewall, and performing the required operations on the database. Let’s see the basics of it.
Create REST Web API project
If you don’t have Visual Studio installed, you can easily download the latest Community Edition (free) and install it on your machine.
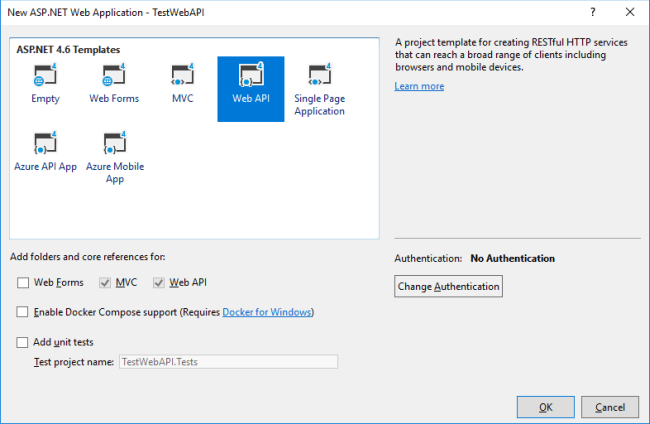
Open Visual Studio >> Add New Project >> select “ASP.NET Web Application (.NET Framework)” project template >> Give a meaningful name to the project and click OK.

On the next screen, select “Web API” template and click OK.
A Web API project with default controller and default methods gets created, as shown below.
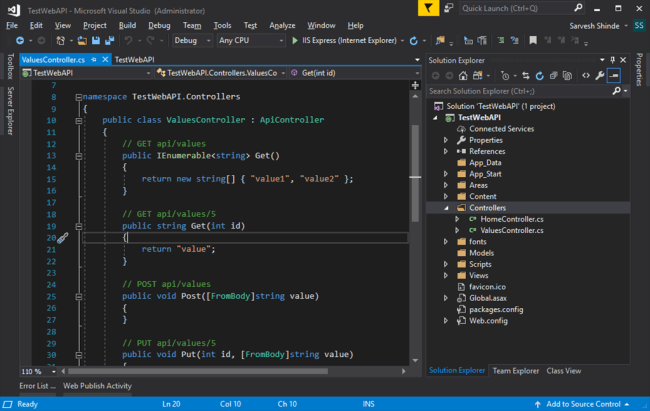
Run the project to test it (click F5) >> by default, Internet Explorer browser will open. Copy the root URL and hit the below API in Chrome or Firefox browser to see the XML/JSON response API endpoint - /api/values.

You can publish the project to Azure web API or local drive. If you want to host this API to on-premise server IIS, then copy the published folder content and paste it in the virtual directory of your IIS site.
Add multiple POST methods
Now let’s see how we can add multiple posts or for that matter, any methods in one controller.
Open your controller class, in our project its ValuesController.cs >> Copy paste below code, these are two sample post methods with a string input and return parameter – you can write your business logic in it. Similarly, you can add any number of POST, GET, PUT, DELETE methods in one controller.
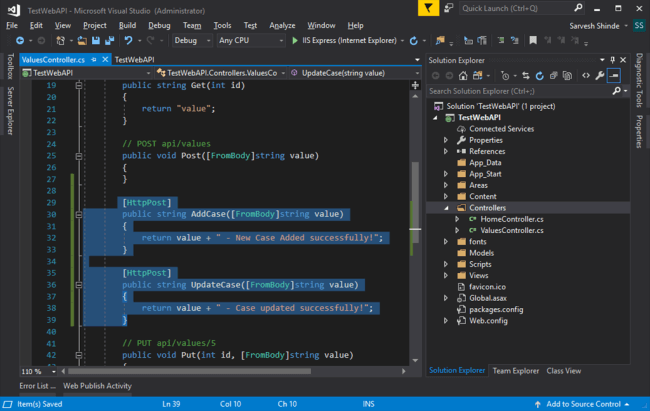
- [HttpPost]
- public string AddCase([FromBody]string value)
- {
- return value + " - New Case Added successfully!";
- }
- [HttpPost]
- public string UpdateCase([FromBody]string value)
- {
- return value + " - Case updated successfully!";
- }
Important configuration
Now, we need to update the route template in WebApiConfig.cs >> Open this class from App_Start folder >> update default MapHttpRoute to new template as shown below >> we just need to add {action} after {controller}
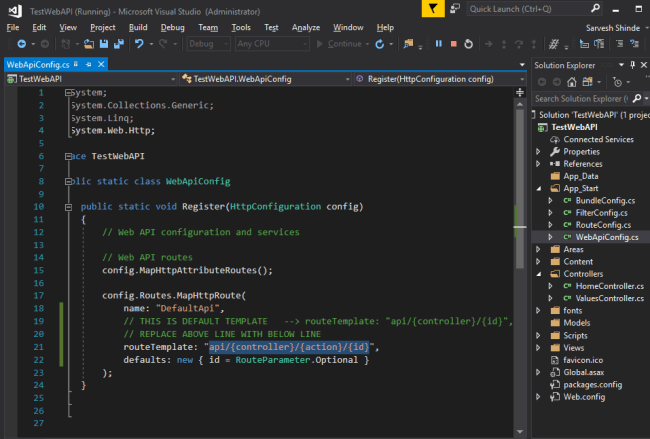
- config.Routes.MapHttpRoute(
- name: "DefaultApi",
- routeTemplate: "api/{controller}/{action}/{id}",
- defaults: new { id = RouteParameter.Optional }
- );
And we are done. Let’s test it with SoapUI. You can easily test get methods in browser but to test post methods you need a tool like SoapUI.
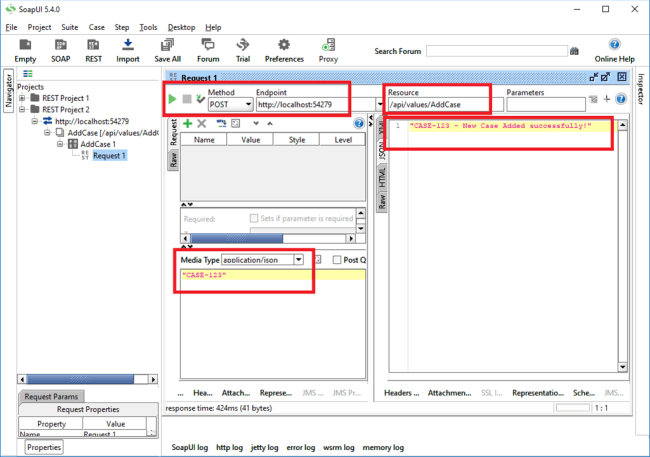
Run Web API project from Visual Studio >> Open SoapUI >> Add new REST Project >> Enter localhost API URL with resource names like http://localhost:54279/api/values/AddCase
As you can see we are able to call AddCase post method successfully - we are passing the string as a body to request and getting a string as a response on right side of the screen.
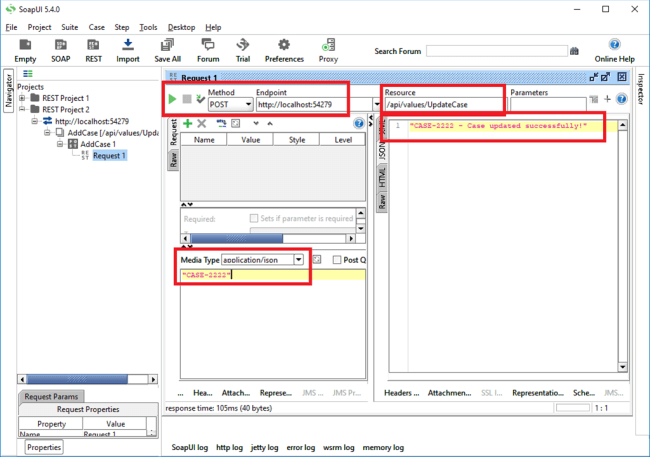
And we are able to run the second post method - UpdateCase with success result as well. You can save this SoapUI project for future testing purposes.
You can send JSON data as the body to your API method, you can make your API authenticated from IIS.
No comments:
Post a Comment