In ASP.NET MVC, by default, all the action methods are accessible to both anonymous and authenticated users. But, if you want the action methods to be available only for authenticated and authorized users, then you need to use the AuthorizationFilter in MVC.

Step 1
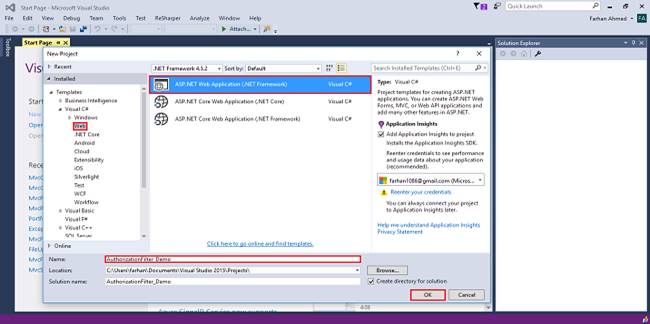
Open Visual Studio 2015 or your an editor of your choice and create a new project.
Step 2
Choose "web application" project and give an appropriate name to your project.

Step 3
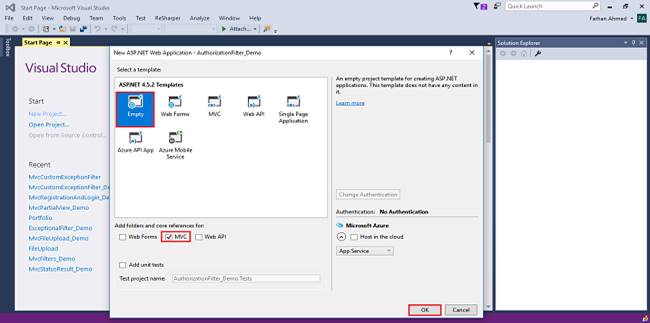
Select "empty" template, check on MVC checkbox, and click OK.
Step 4
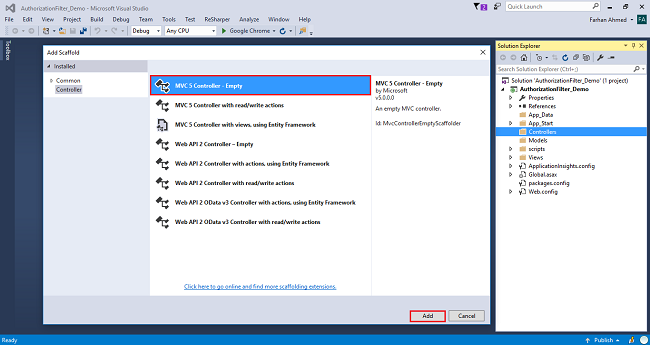
Right-click on the controllers folder and add a new controller.
A window will appear. Choose MVC5 Controller-Empty and click "Add".
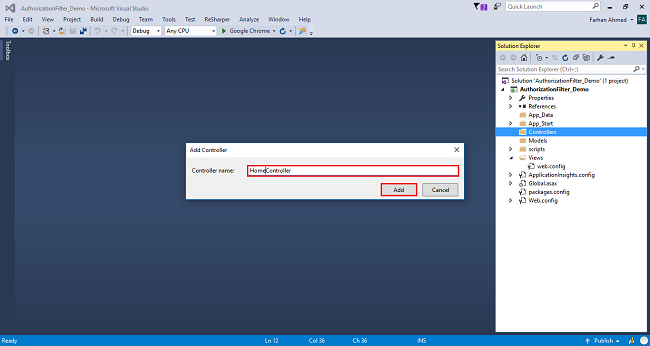
After clicking on "Add", another window will appear with DefaultController. Change the name to HomeController and click "Add". The HomeController will be added under the Controllers folder. Don’t change the Controller suffix for all controllers, change only the highlight - instead of Default, just change Home.
Complete code for HomeController
- using System;
- using System.Collections.Generic;
- using System.Linq;
- using System.Web;
- using System.Web.Mvc;
- namespace AuthorizationFilter_Demo.Controllers
- {
- public class HomeController : Controller
- {
- public ActionResult Index()
- {
- return View();
- }
- [AllowAnonymous]
- public ActionResult NonSecured()
- {
- return View();
- }
- [Authorize]
- public ActionResult Secured()
- {
- return View();
- }
- public ActionResult Login()
- {
- return View();
- }
- }
- }
Step 5
Right-click on Index method in HomeController. The "Add View" window will appear with default index name checked (use a Layout page), and click on "Add. Add three other views - NonSecured, Secured, and Login.
NonSecured View
Right-click on the NonSecured() and then, add a view with name NonSecured. Write the following code in NonSecure.cshtml view.
- @{
- ViewBag.Title = "NonSecured";
- }
- <h2>This method can be accessed by everyone as it is non-secure method</h2>
Secured View
Similarly, right-click on SecureMethod() and add a view with name SecureMethod. Then, write the following code in Secured.cshtml view.
- @{
- ViewBag.Title = "Secured";
- }
- <h2>This method needs to be accessed by authorized users as it Secure Method</h2>
Login View
Similarly, right-click on the Login() method and add the view with name Login.cshtml. Then, write the following code in Login.cshtml view.
- @{
- ViewBag.Title = "Login";
- }
- @using (Html.BeginForm())
- {
- <div class="login-form">
- <h2 class="text-center">Log in</h2>
- <div class="form-group">
- <input type="text" class="form-control" placeholder="Username" required="required">
- </div>
- <div class="form-group">
- <input type="password" class="form-control" placeholder="Password" required="required">
- </div>
- <div class="form-group">
- <button type="submit" class="btn btn-primary btn-block">Log in</button>
- </div>
- <div class="clearfix">
- <label class="pull-left checkbox-inline"><input type="checkbox"> Remember me</label>
- <a href="#" class="pull-right">Forgot Password?</a>
- </div>
- <p class="text-center"><a href="#">Create an Account</a></p>
- </div>
- }
Step 6
Open web.config file and write the following code under the system.web section.
- <authentication mode="Forms">
- <forms loginUrl="/Home/Login"></forms>
- </authentication>
Step 7
Build and run your project by pressing ctrl + F5.
That’s it. Now, run the application and navigate to /Home/Secured. Then, you will see that it will redirect you to the Login method.
How to use AllowAnonymous in MVC?
If you want to allow anonymous access to the NonSecured of Home controller, then you need to decorate the AllowAnonymous attribute to that NonSecuredmethod as shown below. The AllowAnonymous attribute in MVC is used to skip the authorization which is enforced by Authorization Filter in MVC.
- [AllowAnonymous]
- public ActionResult NonSecured()
- {
- return View();
- }
Now, run the application and navigate to /Home/NonSecured and you will see that it displays the page as expected and when you navigate to /Home/Secured, then it will redirect you to the Login page.

No comments:
Post a Comment