Azure routes traffic between all subnets within a virtual network, by default. You can create your own routes to override Azure's default routing. The ability to create custom routes is helpful if, for example, you want to route traffic between subnets through a network virtual appliance (NVA). In this tutorial, you learn how to:
- 1. Create a route table
- 2. Create a route
- 3. Create a virtual network with multiple subnets
- 4. Associate a route table to a subnet
- 5. Create an NVA that routes traffic
- 6. Deploy virtual machines (VM) into different subnets
- 7. Route traffic from one subnet to another through an NVA
If you prefer, you can finish this tutorial using the Azure CLI or Azure PowerShell.
If you don't have an Azure subscription, create a free account before you begin.
Sign in to Azure
Sign in to the Azure portal.
Create a route table
- On the upper-left side of the screen, select Create a resource > Networking > Route table.
- In Create route table, enter or select this information:
- Select Create.
Create a route
- In the portal's search bar, enter myRouteTablePublic.
- When myRouteTablePublic appears in the search results, select it.
- In myRouteTablePublic under Settings, select Routes > + Add.

- In Add route, enter or select this information:
- Select OK.
Associate a route table to a subnet
Before you can associate a route table to a subnet, you have to create a virtual network and subnet.
Create a virtual network
- On the upper-left side of the screen, select Create a resource > Networking > Virtual network.
- In Create virtual network, enter or select this information:
- Leave the rest of the defaults and select Create.
Add subnets to the virtual network
- In the portal's search bar, enter myVirtualNetwork.
- When myVirtualNetwork appears in the search results, select it.
- In myVirtualNetwork, under Settings, select Subnets > + Subnet.

- In Add subnet, enter this information:
- Leave the rest of the defaults and select OK.
- Select + Subnet again. This time, enter this information:
- Like the last time, leave the rest of the defaults and select OK.Azure shows the three subnets: Public, Private, and DMZ.
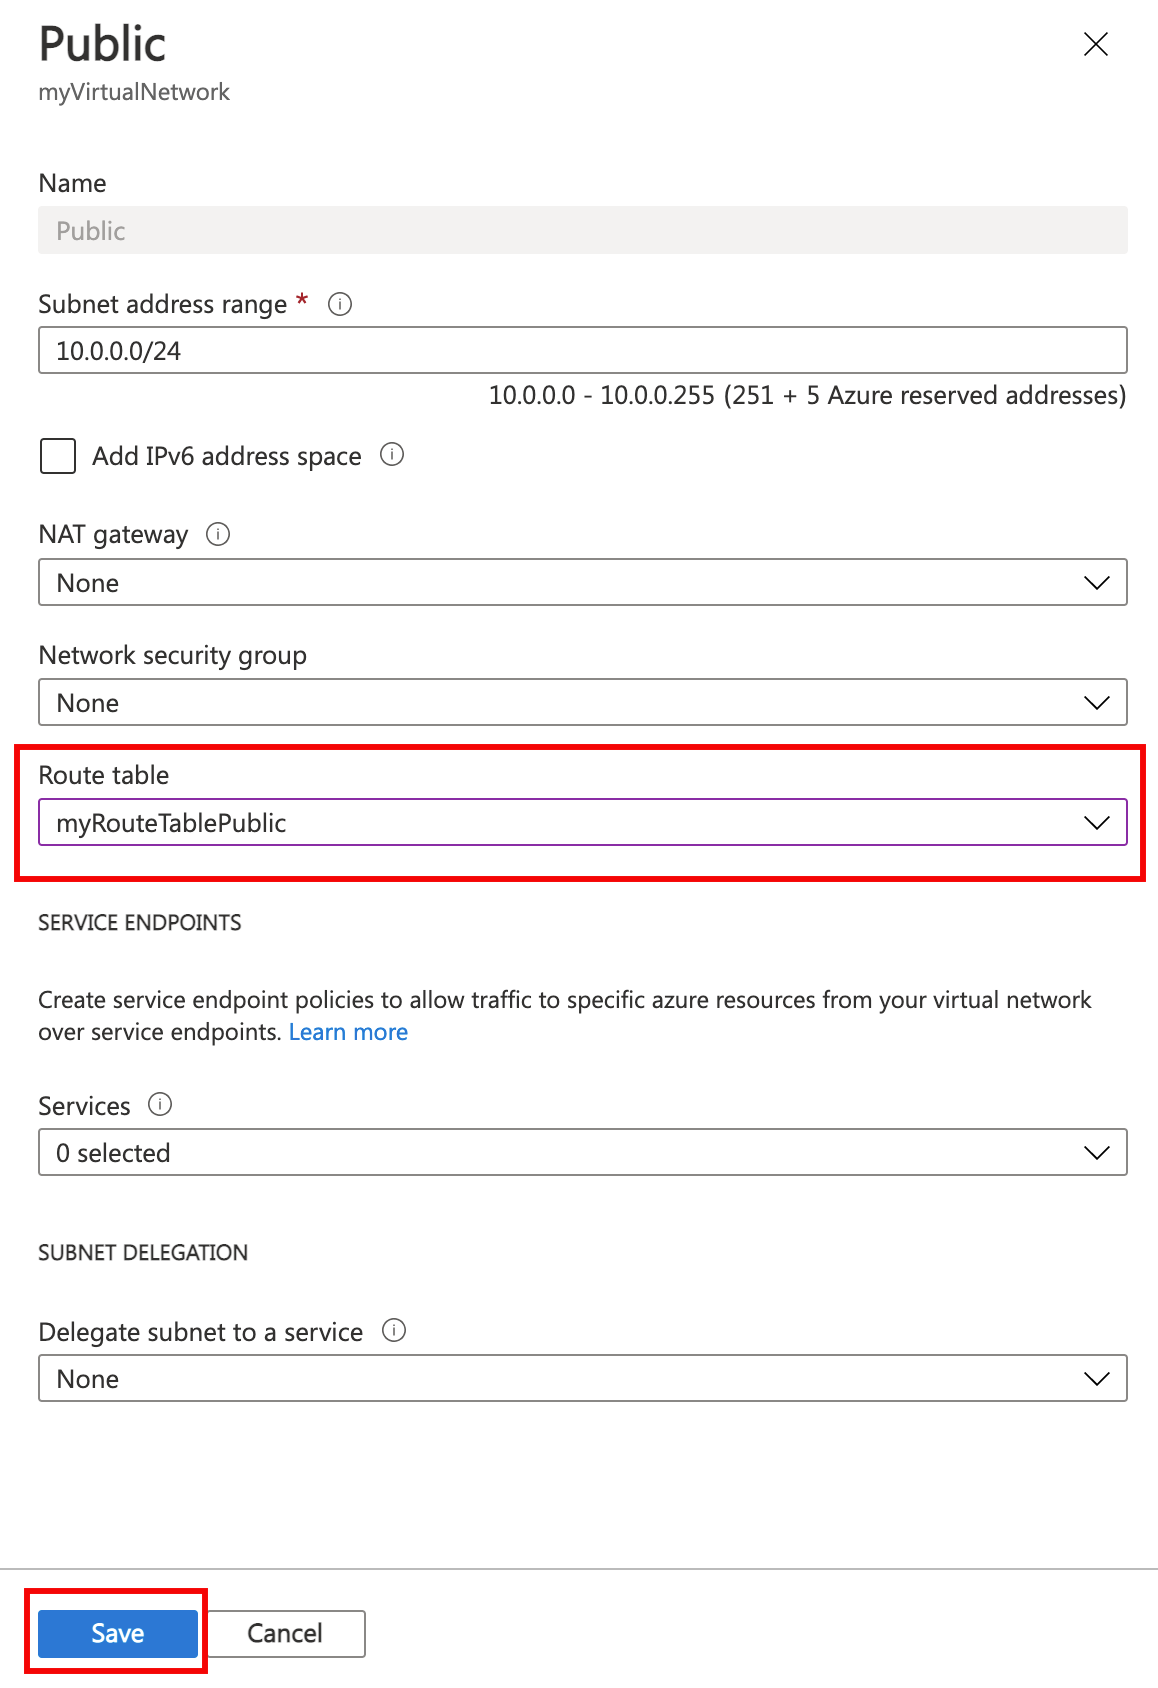
Associate myRouteTablePublic to your Public subnet
- Select Public.
- In Public, select Route table > MyRouteTablePublic > Save.

Create an NVA
NVAs are VMs that help with network functions like routing and firewall optimization. You can select a different operating system if you want. This tutorial assumes you're using Windows Server 2016 Datacenter.
- On the upper-left side of the screen, select Create a resource > Compute > Windows Server 2016 Datacenter.
- In Create a virtual machine - Basics, enter or select this information:
- Select Next : Disks.
- In Create a virtual machine - Disks, select the settings that are right for your needs.
- Select Next : Networking.
- In Create a virtual machine - Networking, select this information:
- Leave the rest of the defaults and select Next : Management.
- In Create a virtual machine - Management, for Diagnostics storage account, select Create New.
- In Create storage account, enter or select this information:
- Select OK
- Select Review + create. You're taken to the Review + create page and Azure validates your configuration.
- When you see that Validation passed, select Create.The VM takes a few minutes to create. Don't keep going until Azure finishes creating the VM. The Your deployment is underway page will show you deployment details.
- When your VM is ready, select Go to resource.
Turn on IP forwarding
Turn on IP forwarding for myVmNva. When Azure sends network traffic to myVmNva, if the traffic is destined for a different IP address, IP forwarding will send the traffic to the correct location.
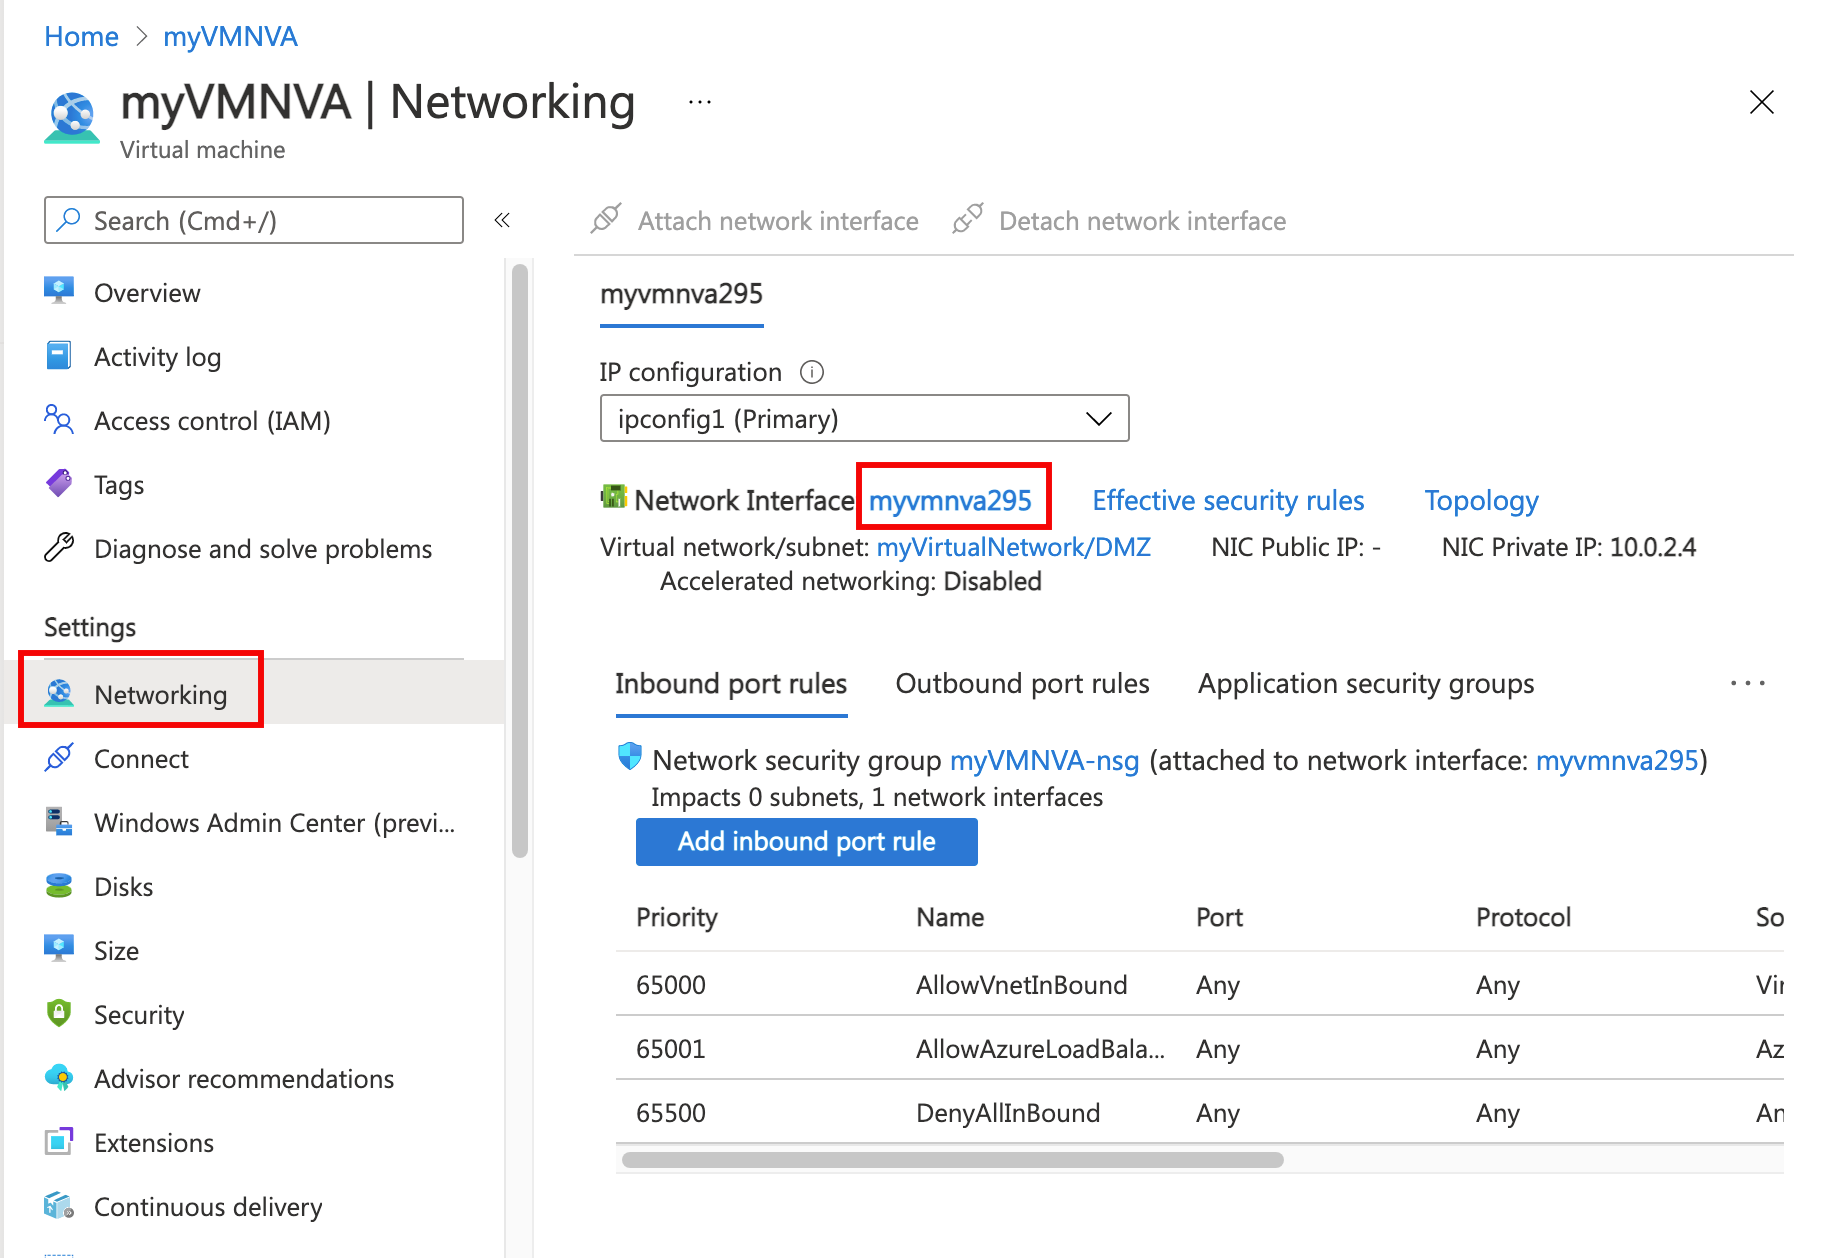
- On myVmNva, under Settings, select Networking.
- Select myvmnva123. That's the network interface Azure created for your VM. It will have a string of numbers to make it unique for you.

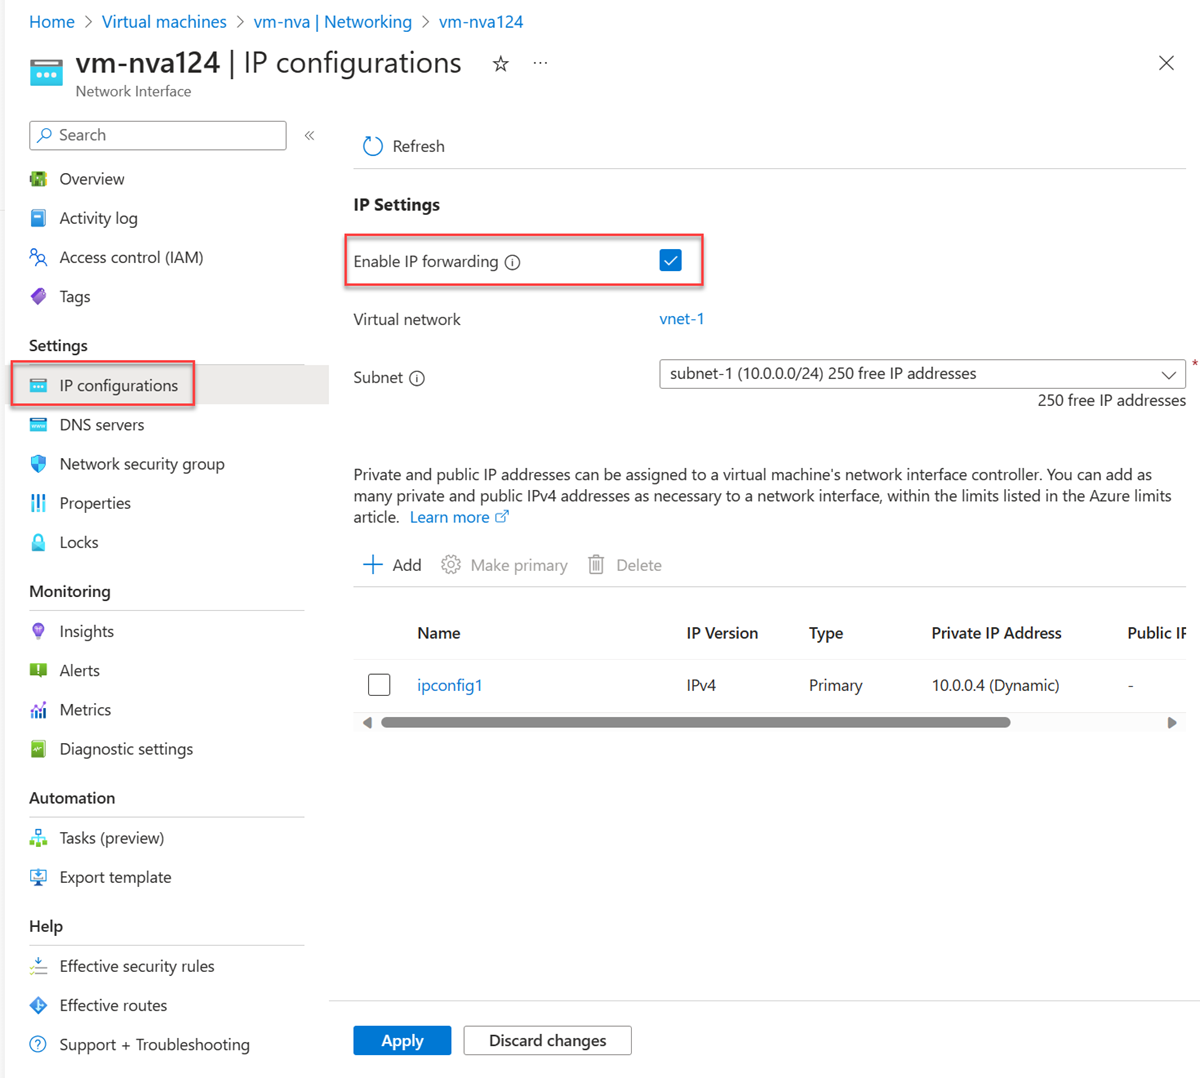
- Under Settings, select IP configurations.
- On myvmnva123 - IP configurations, for IP forwarding, select Enabled and then select Save.

Create public and private virtual machines
Create a public VM and a private VM in the virtual network. Later, you'll use them to see that Azure routes the Public subnet traffic to the Private subnet through the NVA.
Complete steps 1-12 of Create an NVA. Use most of the same settings. These values are the ones that have to be different:
You can create the myVmPrivate VM while Azure creates the myVmPublic VM. Don't continue with the rest of the steps until Azure finishes creating both VMs.
Route traffic through an NVA
Sign in to myVmPrivate over remote desktop
- In the portal's search bar, enter myVmPrivate.
- When the myVmPrivate VM appears in the search results, select it.
- Select Connect to create a remote desktop connection to the myVmPrivate VM.
- In Connect to virtual machine, select Download RDP File. Azure creates a Remote Desktop Protocol (.rdp) file and downloads it to your computer.
- Open the downloaded .rdp file.
- If prompted, select Connect.
- Enter the user name and password you specified when creating the Private VM.
- You may need to select More choices > Use a different account, to use the Private VM credentials.
- Select OK.You may receive a certificate warning during the sign in process.
- Select Yes to connect to the VM.
Enable ICMP through the Windows firewall
In a later step, you'll use the trace route tool to test routing. Trace route uses the Internet Control Message Protocol (ICMP), which the Windows Firewall denies by default. Enable ICMP through the Windows firewall.
- In the Remote Desktop of myVmPrivate, open PowerShell.
- Enter this command:PowerShell:-
New-NetFirewallRule –DisplayName “Allow ICMPv4-In” –Protocol ICMPv4You're using trace route to test routing in this tutorial. For production environments, we don't recommend allowing ICMP through the Windows Firewall.
Turn on IP forwarding within myVmNva
You turned on IP forwarding for the VM's network interface using Azure. The VM's operating system also has to forward network traffic. Turn on IP forwarding for myVmNva VM's operating system with these commands.
- From a command prompt on the myVmPrivate VM, open a remote desktop to the myVmNvaVM:cmd
mstsc /v:myvmnva - From PowerShell on the myVmNva, enter this command to turn on IP forwarding:PowerShell:-
Set-ItemProperty -Path HKLM:\SYSTEM\CurrentControlSet\Services\Tcpip\Parameters -Name IpEnableRouter -Value 1 - Restart the myVmNva VM. From the taskbar, select Start button > Power button, Other (Planned) > Continue.That also disconnects the remote desktop session.
- After the myVmNva VM restarts, create a remote desktop session to the myVmPublic VM. While still connected to the myVmPrivate VM, open a command prompt and run this command:cmd
mstsc /v:myVmPublic - In the Remote Desktop of myVmPublic, open PowerShell.
- Enable ICMP through the Windows firewall by entering this command:PowerShell:-
New-NetFirewallRule –DisplayName “Allow ICMPv4-In” –Protocol ICMPv4
Test the routing of network traffic
First, let's test routing of network traffic from the myVmPublic VM to the myVmPrivate VM.
- From PowerShell on the myVmPublic VM, enter this command:PowerShell:-
tracert myVmPrivateThe response is similar to this example:PowerShell:-Tracing route to myVmPrivate.vpgub4nqnocezhjgurw44dnxrc.bx.internal.cloudapp.net [10.0.1.4] over a maximum of 30 hops: 1 <1 ms * 1 ms 10.0.2.4 2 1 ms 1 ms 1 ms 10.0.1.4 Trace complete.You can see the first hop is to 10.0.2.4. It's NVA's private IP address. The second hop is to the private IP address of the myVmPrivate VM: 10.0.1.4. Earlier, you added the route to the myRouteTablePublic route table and associated it to the Public subnet. As a result, Azure sent the traffic through the NVA and not directly to the Private subnet. - Close the remote desktop session to the myVmPublic VM, which leaves you still connected to the myVmPrivate VM.
- From a command prompt on the myVmPrivate VM, enter this command:cmd
tracert myVmPublicIt tests the routing of network traffic from the myVmPrivate VM to the myVmPublic VM. The response is similar to this example:cmdTracing route to myVmPublic.vpgub4nqnocezhjgurw44dnxrc.bx.internal.cloudapp.net [10.0.0.4] over a maximum of 30 hops: 1 1 ms 1 ms 1 ms 10.0.0.4 Trace complete.You can see Azure routes traffic directly from the myVmPrivate VM to the myVmPublic VM. By default, Azure routes traffic directly between subnets. - Close the remote desktop session to the myVmPrivate VM.
Clean up resources
When no longer needed, delete the resource group and all resources it has:
- In the portal's search bar, enter myResourceGroup.
- When you see myResourceGroup in the search results, select it.
- Select Delete resource group.
- Enter myResourceGroup for TYPE THE RESOURCE GROUP NAME: and select Delete.

No comments:
Post a Comment